3 Easy Ways To Insert a PDF into PowerPoint
Frustrated by the difficulty of formatting? How can you ensure that your gorgeously designed PDF document retains its elegance when incorporated into a PowerPoint presentation?
There are three primary methods to insert a PDF into PowerPoint:
- Insert a PDF document as an object.
- Inserting a PDF as a screenshot or image.
- Adding a PDF hyperlink to your PowerPoint slide.
Combining PDF content with a PowerPoint presentation will allow you to visually present data and information from multiple sources without having to retype or recreate the content.
Read More: How to Merge PDF Documents in 2023
This article will discuss the simple yet effective process of incorporating a PDF file into a PowerPoint slide, providing step-by-step instructions to enhance your next presentation.
Let’s get going!
How to Insert PDF into PowerPoint
By inserting a PDF into a PowerPoint presentation, you can add detailed documents, charts, or images to your slides.
PowerPoint provides multiple methods for displaying a PDF file in its entirety or a specific portion thereof.
This segment will demonstrate the three quickest and easiest methods for inserting a PDF into PowerPoint.
1. Inserting a PDF as an Object
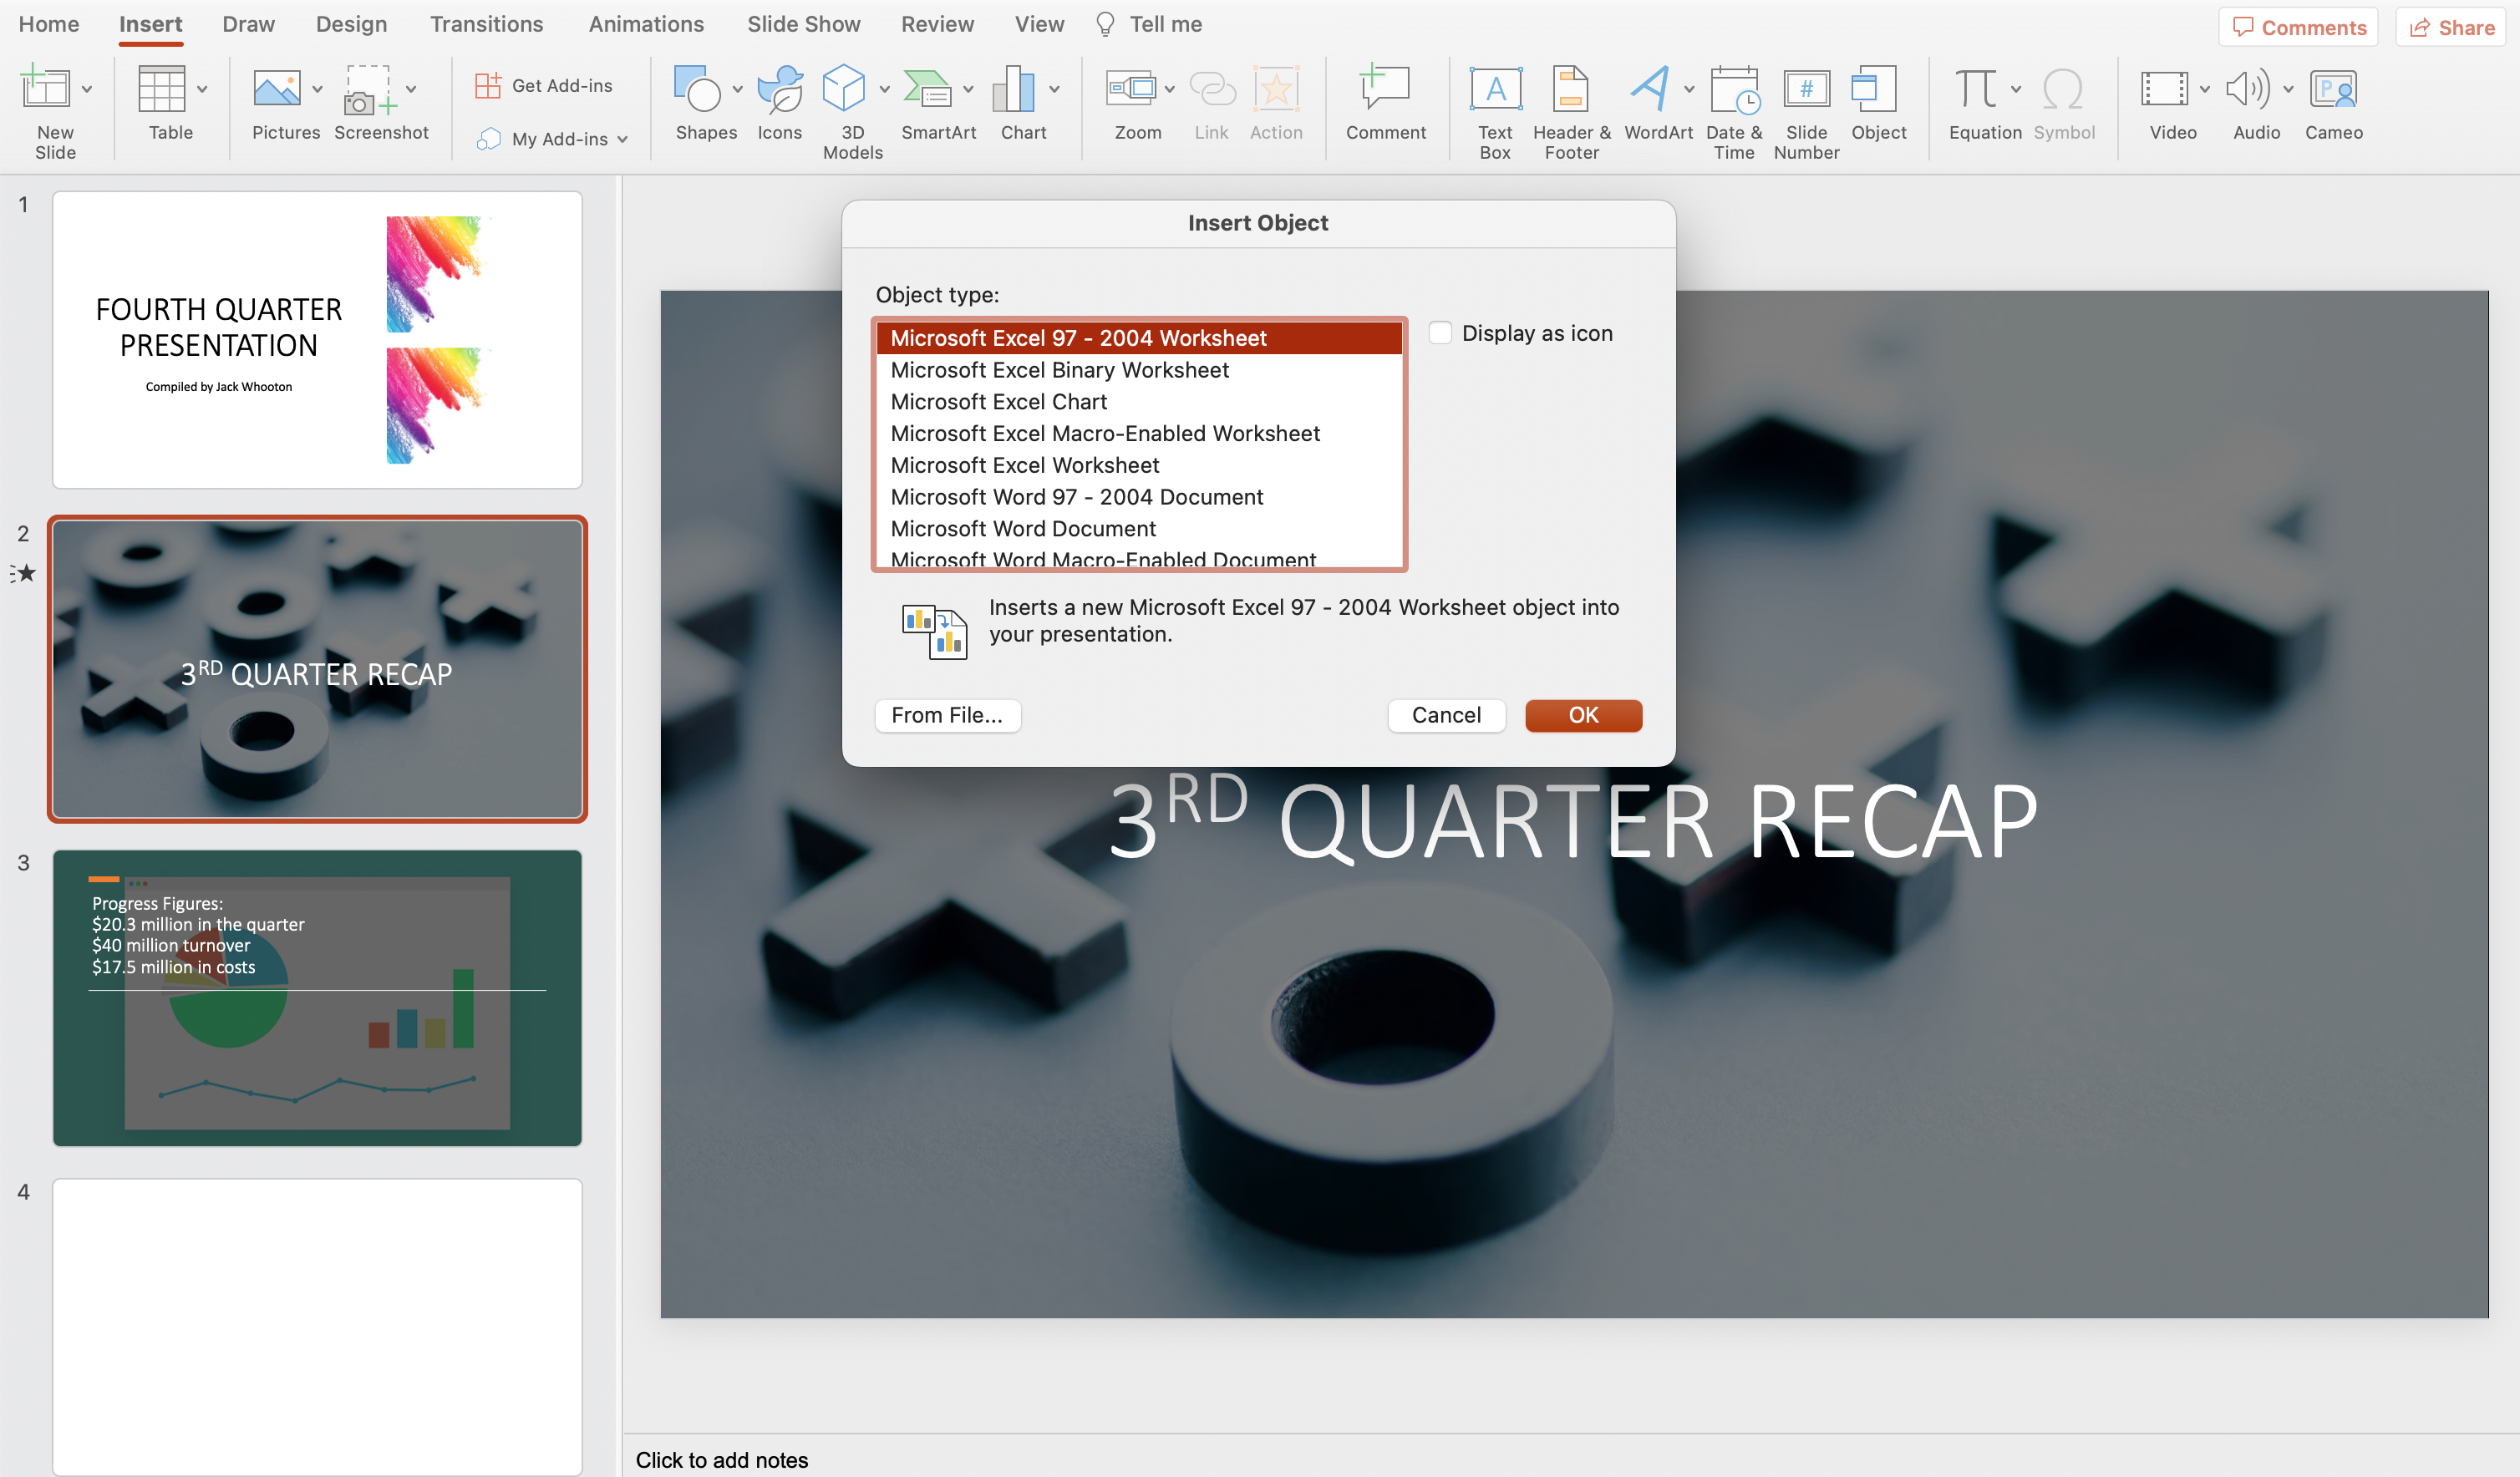
You can utilize the ‘Create from file’ option to incorporate a PDF file into your PowerPoint presentation.
This allows you to display the PDF’s content directly on your slide as an object.
Follow these straightforward procedures to use this function:
- Make sure your PDF is closed.
- Open PowerPoint and navigate to the slide in the PowerPoint presentation file where you want to insert the PDF.
- Click on “Insert” in the menu bar.
- Click on “Object”.
- In the Insert > Object box, click on “Create from File”.
- Select the PDF file you wish to insert.
- Click “OK” to insert it.
Once the PDF file has been inserted, a PDF indicator with the file’s name will appear on the slide.
Double-click the icon to access the PDF file that was inserted. This will launch your default PDF reader and display the PDF file’s contents during your presentation for simple reference.
Please note that embedding a PDF as an object can cause your PowerPoint file size to increase.
Consider inserting the PDF file as an image or providing a link to it if maintaining a tiny file size is a priority.
2. Inserting as an Image or Screenshot
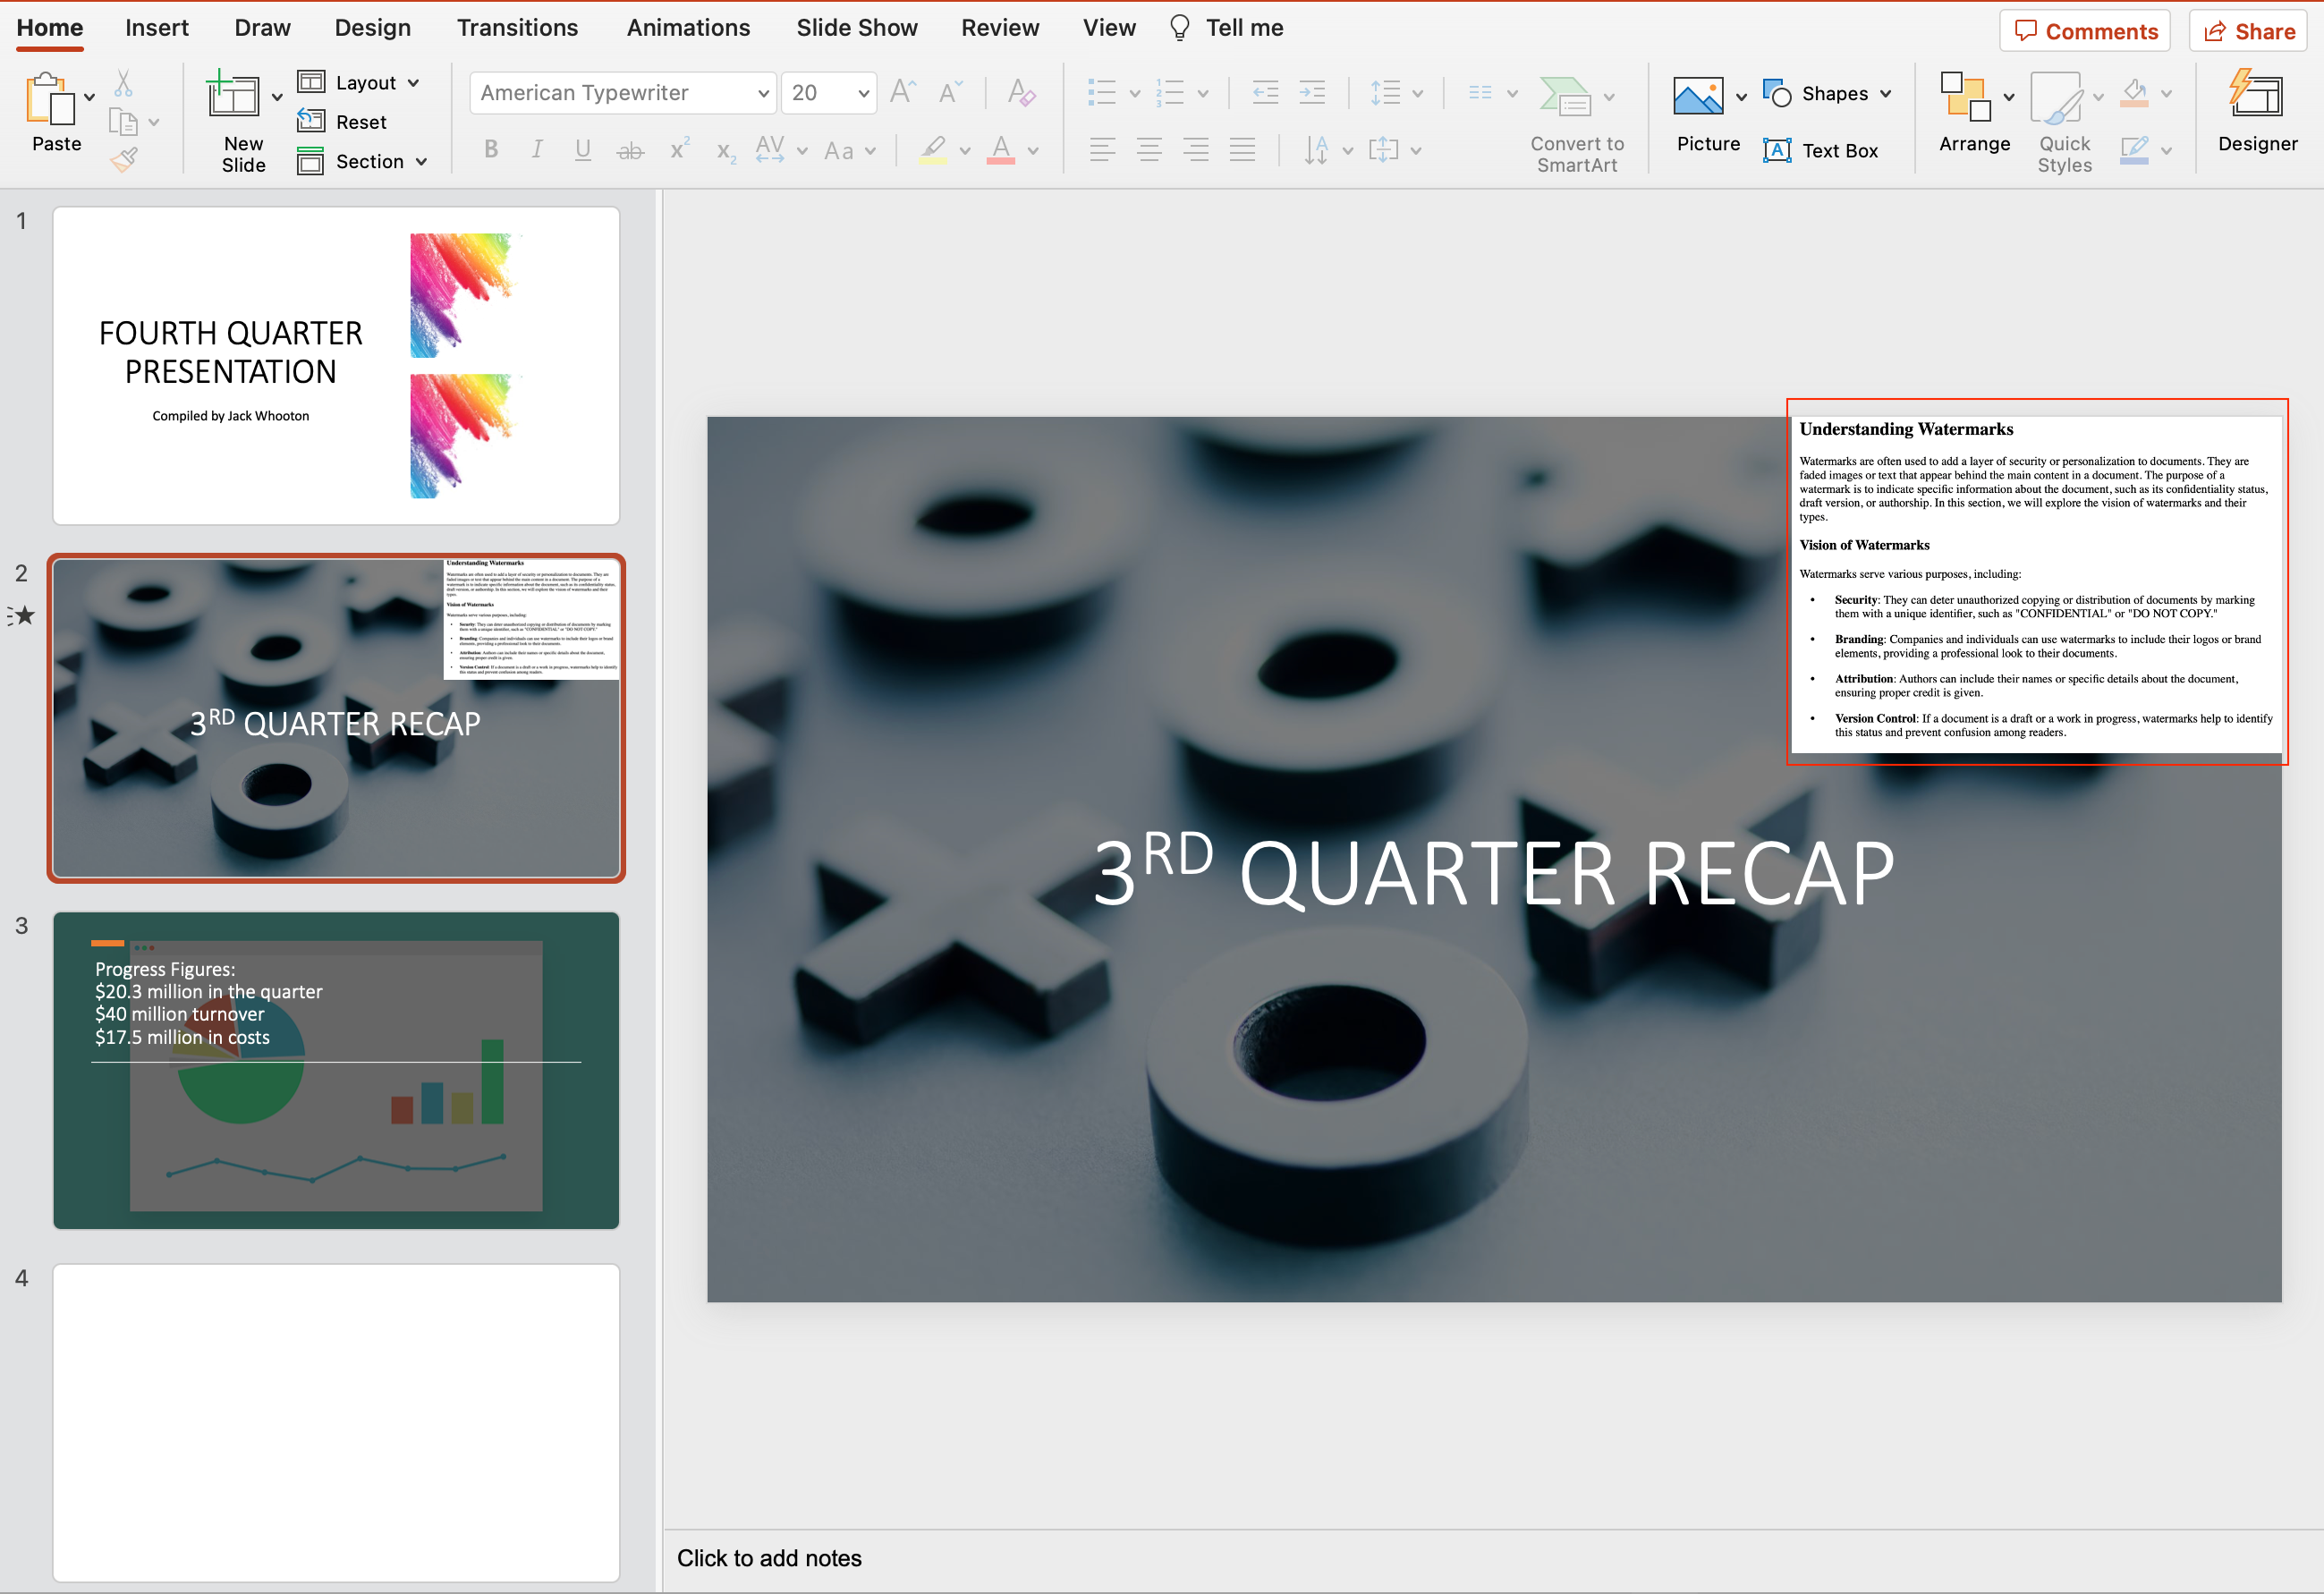
Inserting a PDF into PowerPoint as a screenshot is beneficial when you want to display only a portion of a PDF file without embedding the entire file.
This method enables you to preserve the visual formatting of the PDF file, making it simple for your audience to comprehend the content.
PDF content can be inserted as an image or screenshot using the Snipping Tool, Screen Clipping, or by converting the PDF to an image.
1. Use the Snipping Tool
The Snipping Tool is a built-in feature of the Windows and Macintosh operating systems that enables you to take customized screenshots of any open window or a selected region of the screen.
To capture a PDF image for your PowerPoint presentation using the Snipping Tool:
- Open the PDF file and navigate to the page you want to capture.
- Launch the Windows Snipping Tool from the Start menu or by searching for it in the search bar.
- Select the “New” button in the Snipping Tool window.
- If you are using a Mac, disregard steps 2 and 3 and use the shortcut Shift+Command+4.
- Click and drag your mouse to create a custom selection around the area of the PDF you want to capture.
- Release the mouse button, and the Snipping Tool will capture the selected area.
- Save the captured image as a JPEG or PNG image.
Now, you can insert the saved image into your PowerPoint presentation:
- Open your PowerPoint presentation and select the slide where you want to add the image.
- Click the “Insert” tab in the PowerPoint toolbar.
- Click “Pictures,” then navigate to the saved image file and click “Insert.”
2. Use Screen Clipping
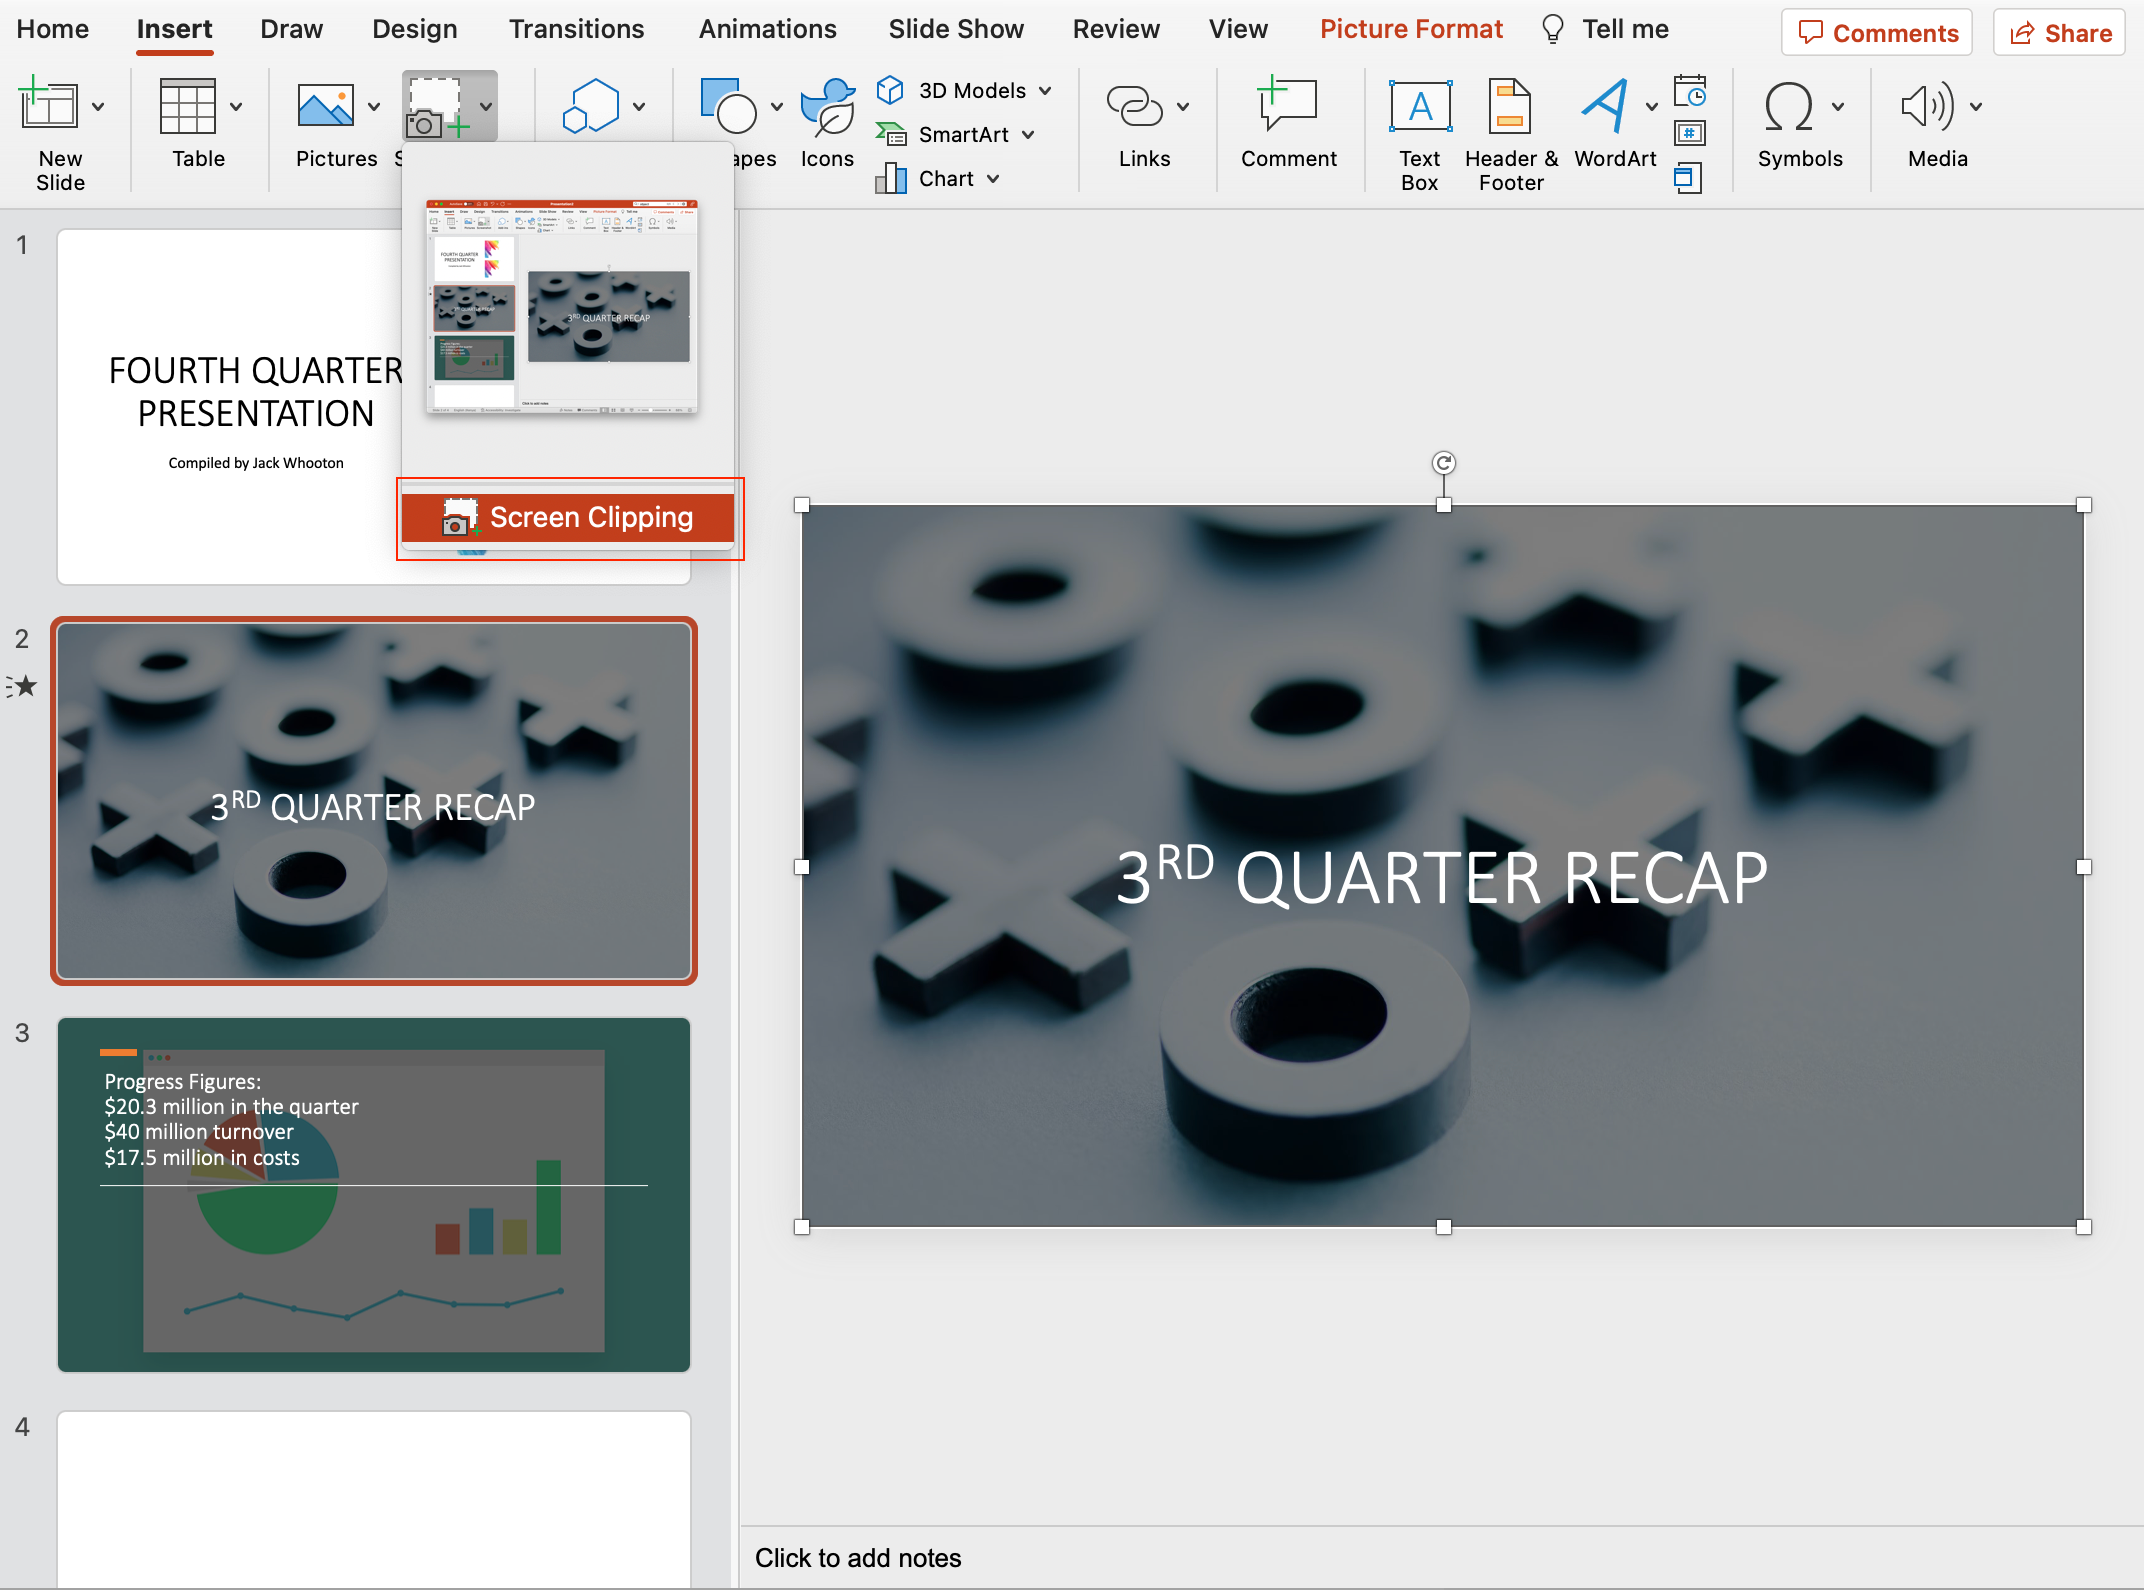
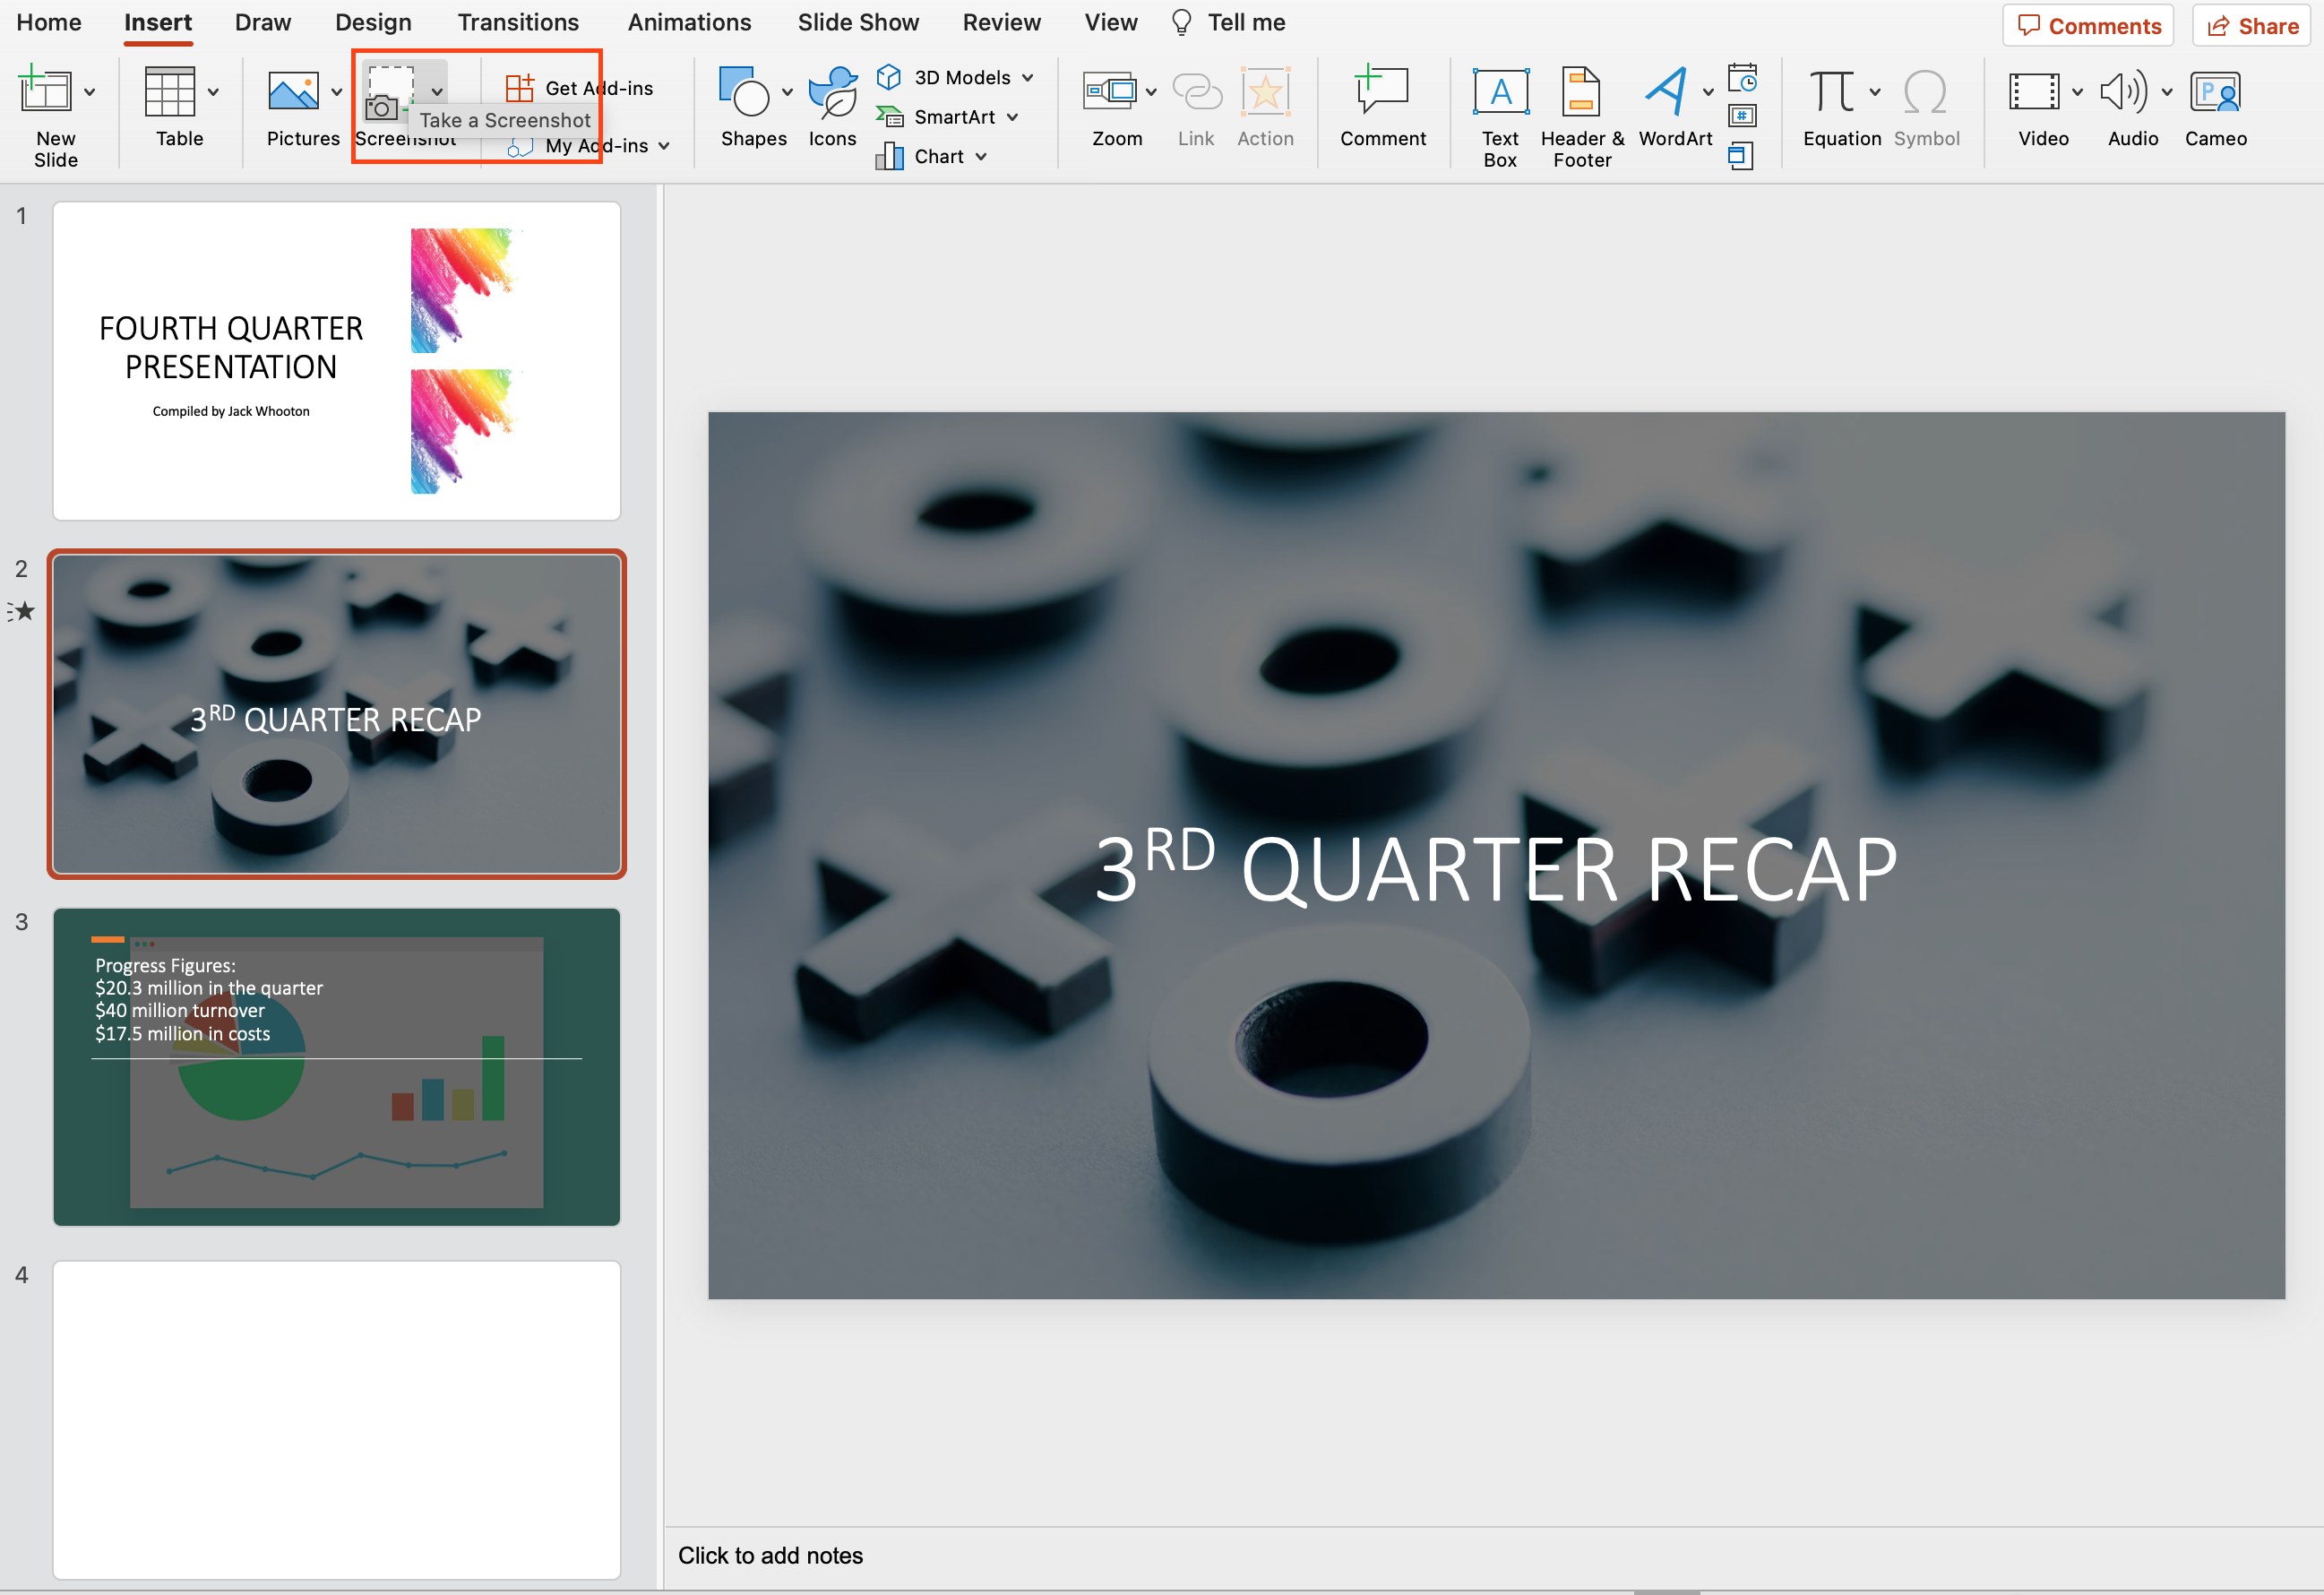
PowerPoint also has a built-in screen clipping feature that allows you to capture an image of another open window directly from the application.
To use this feature:
- Both the PDF file and your PowerPoint presentation should be opened.
- Within the PDF file, navigate to the desired page.
- Select the slide where you want to insert the image in PowerPoint.
- In the PowerPoint toolbar, select the “Insert” tab.
- Within the “Images” section, select “Screenshot.”
- To capture a screenshot of a PDF file, select the window displaying the file from the list of available windows.
- If necessary, resize or compress the image by selecting it and utilizing PowerPoint’s formatting tools.
By following these steps, you will be able to confidently insert PDF content as an image or screenshot into your PowerPoint presentation, thereby enhancing the visual appeal of your content for your audience.
3. Convert PDF into Images
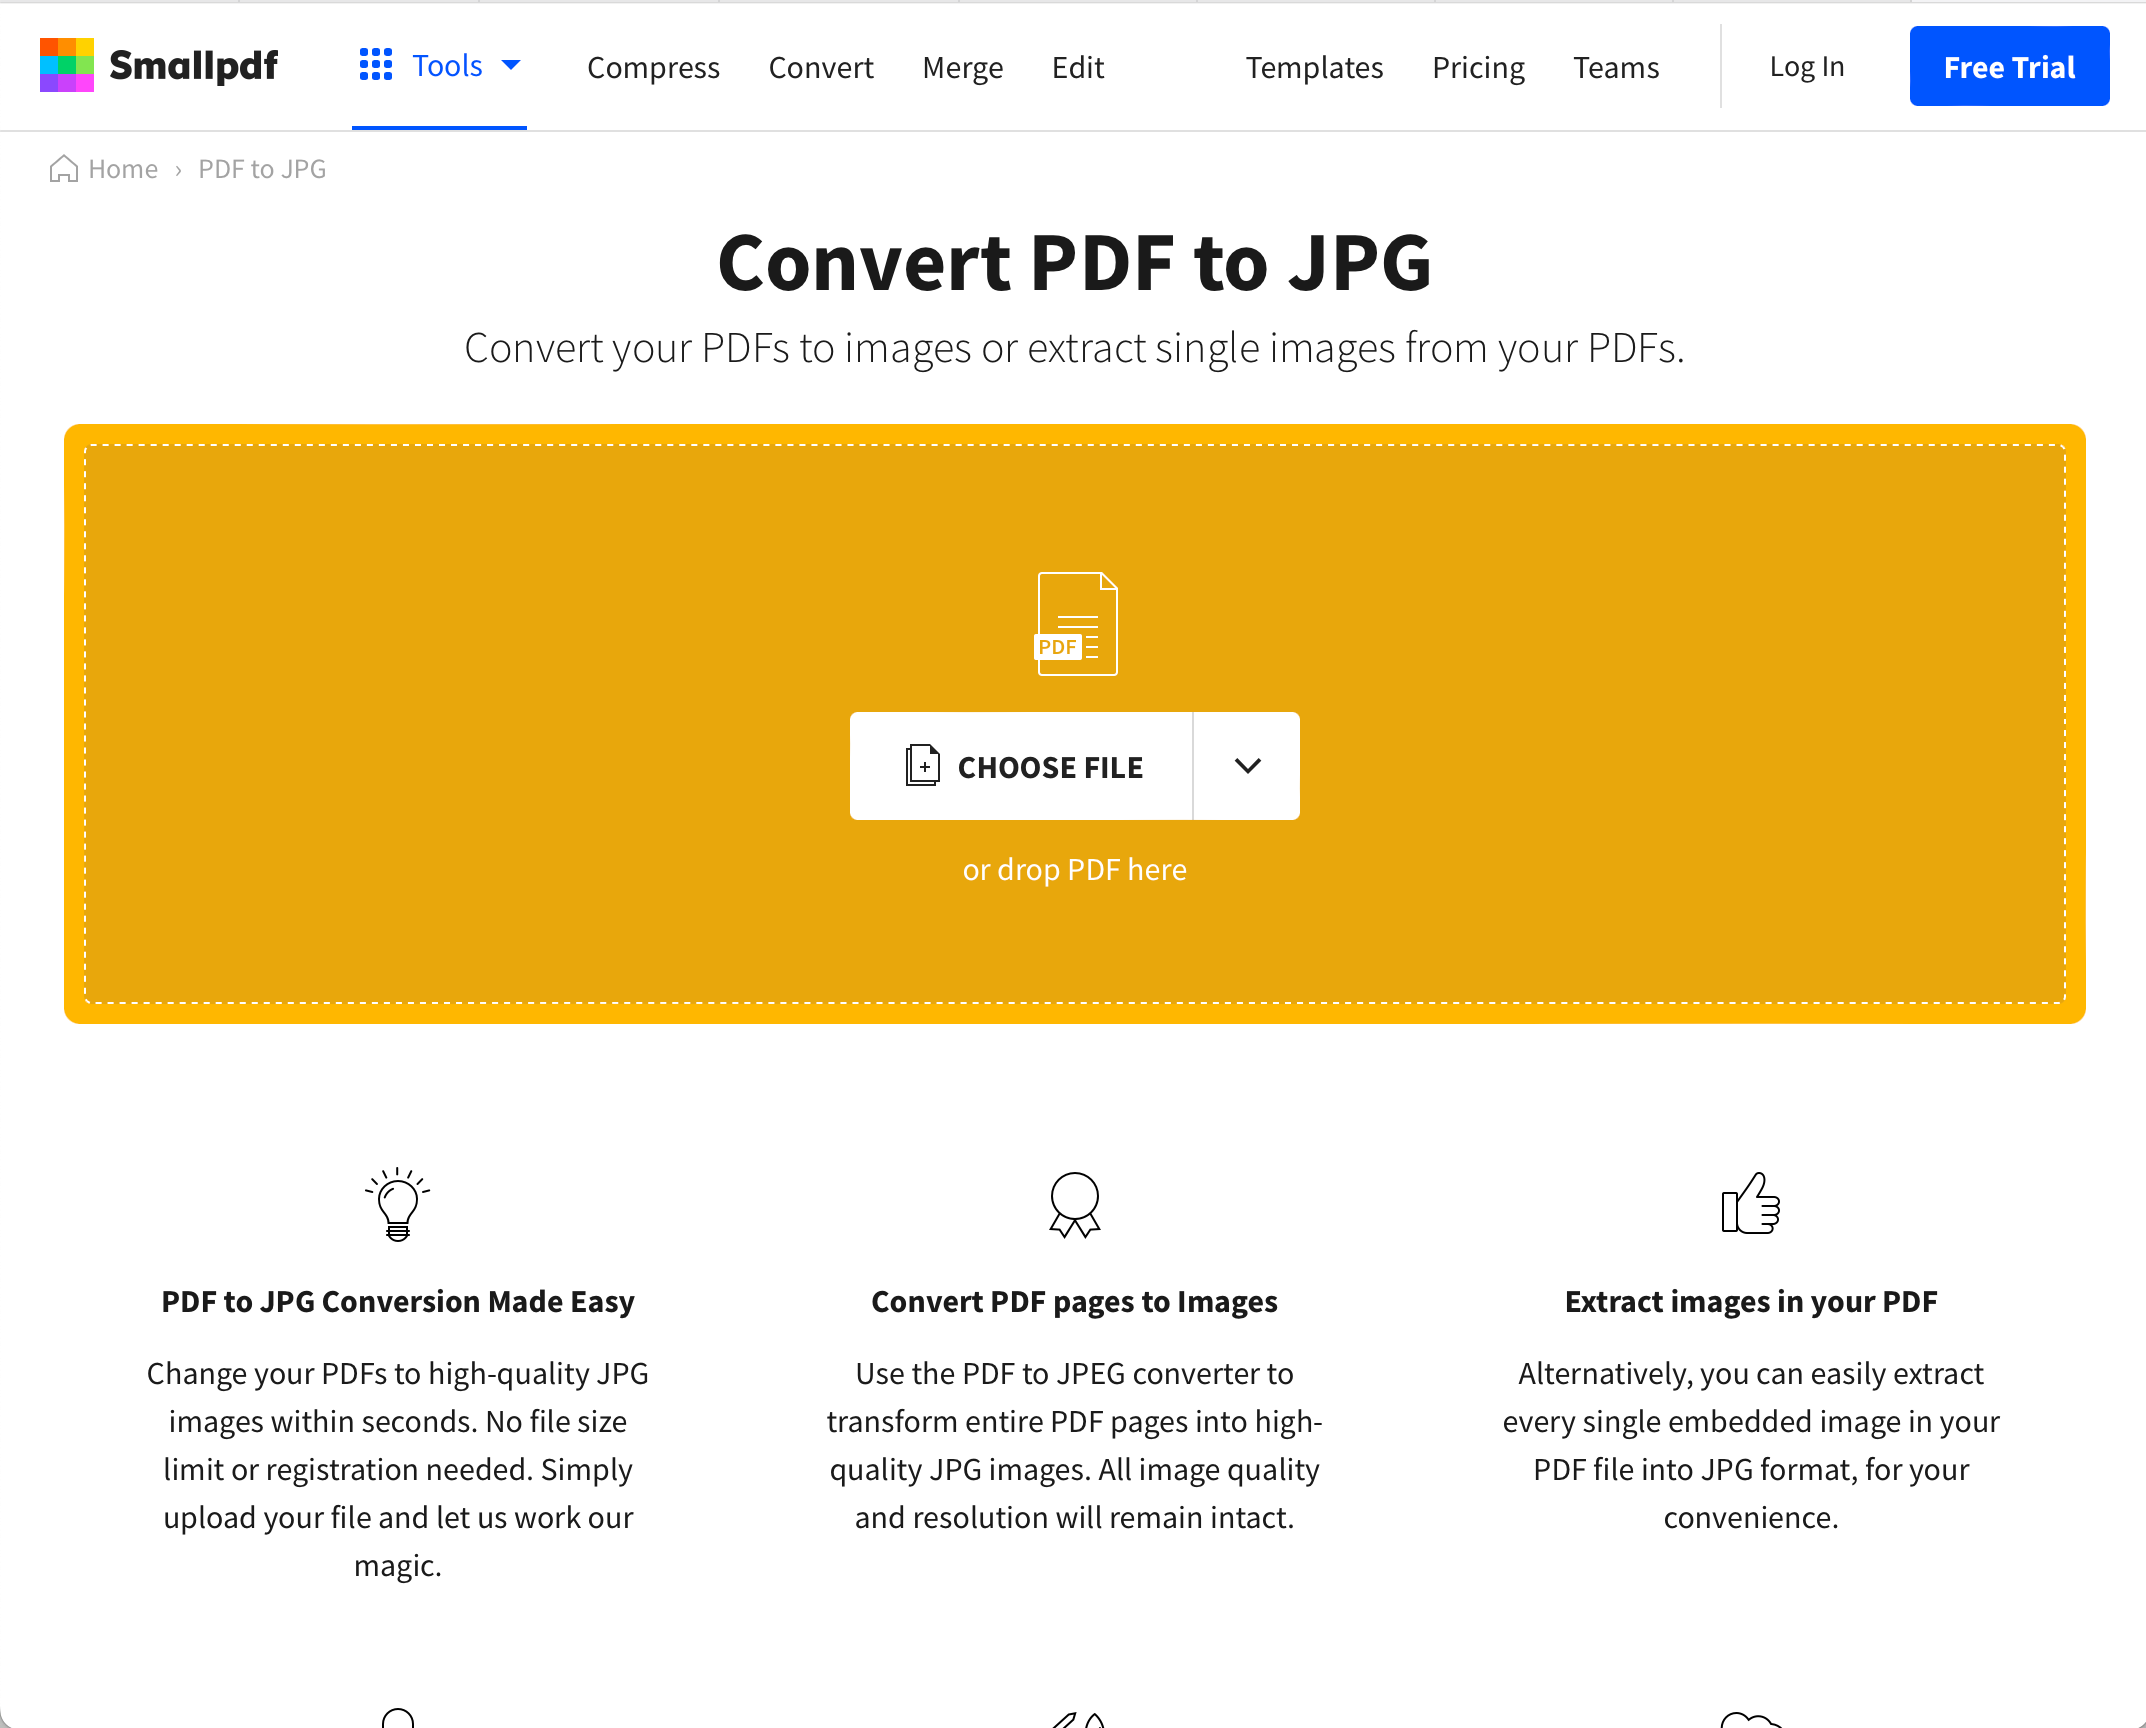
Converting a PDF file to image format is an effective method for incorporating a PDF into a PowerPoint presentation.
This method enables users to effortlessly insert clear and visually enticing images into their slides.
To accomplish this, you can utilize an online tool or specialized software applications. Online tools such as Smallpdf and ILovePDF provide fast and secure PDF-to-image conversion options.
These tools typically support various image formats, including JPEG, PNG, and BMP.
Follow these simple steps for online conversion:
- Choose an online PDF-to-image converter.
- Upload the PDF file you would like to convert.
- Select the desired image format for the converted file.
- Click the convert button and wait for the process to finish.
- Download the converted images and save them on your computer.
Software applications such as Adobe Acrobat and PDFelement can convert PDF files to images with enhanced functionality and output quality for those who prefer a more robust solution.
To insert the converted images into PowerPoint:
- Navigate to the desired slide.
- Click on the “Insert” tab.
- Select “Pictures.”
- Select the image files on your computer.
- Insert them one by one into the slides.
By converting a PDF to images, you are able to preserve the visual integrity of the original file while integrating it seamlessly into a PowerPoint presentation.
This method demonstrates a confident, knowledgeable, neutral, and clear approach to presenting information, as it is adaptable and practical.
3. Hyperlinking PDF to PowerPoint Slide
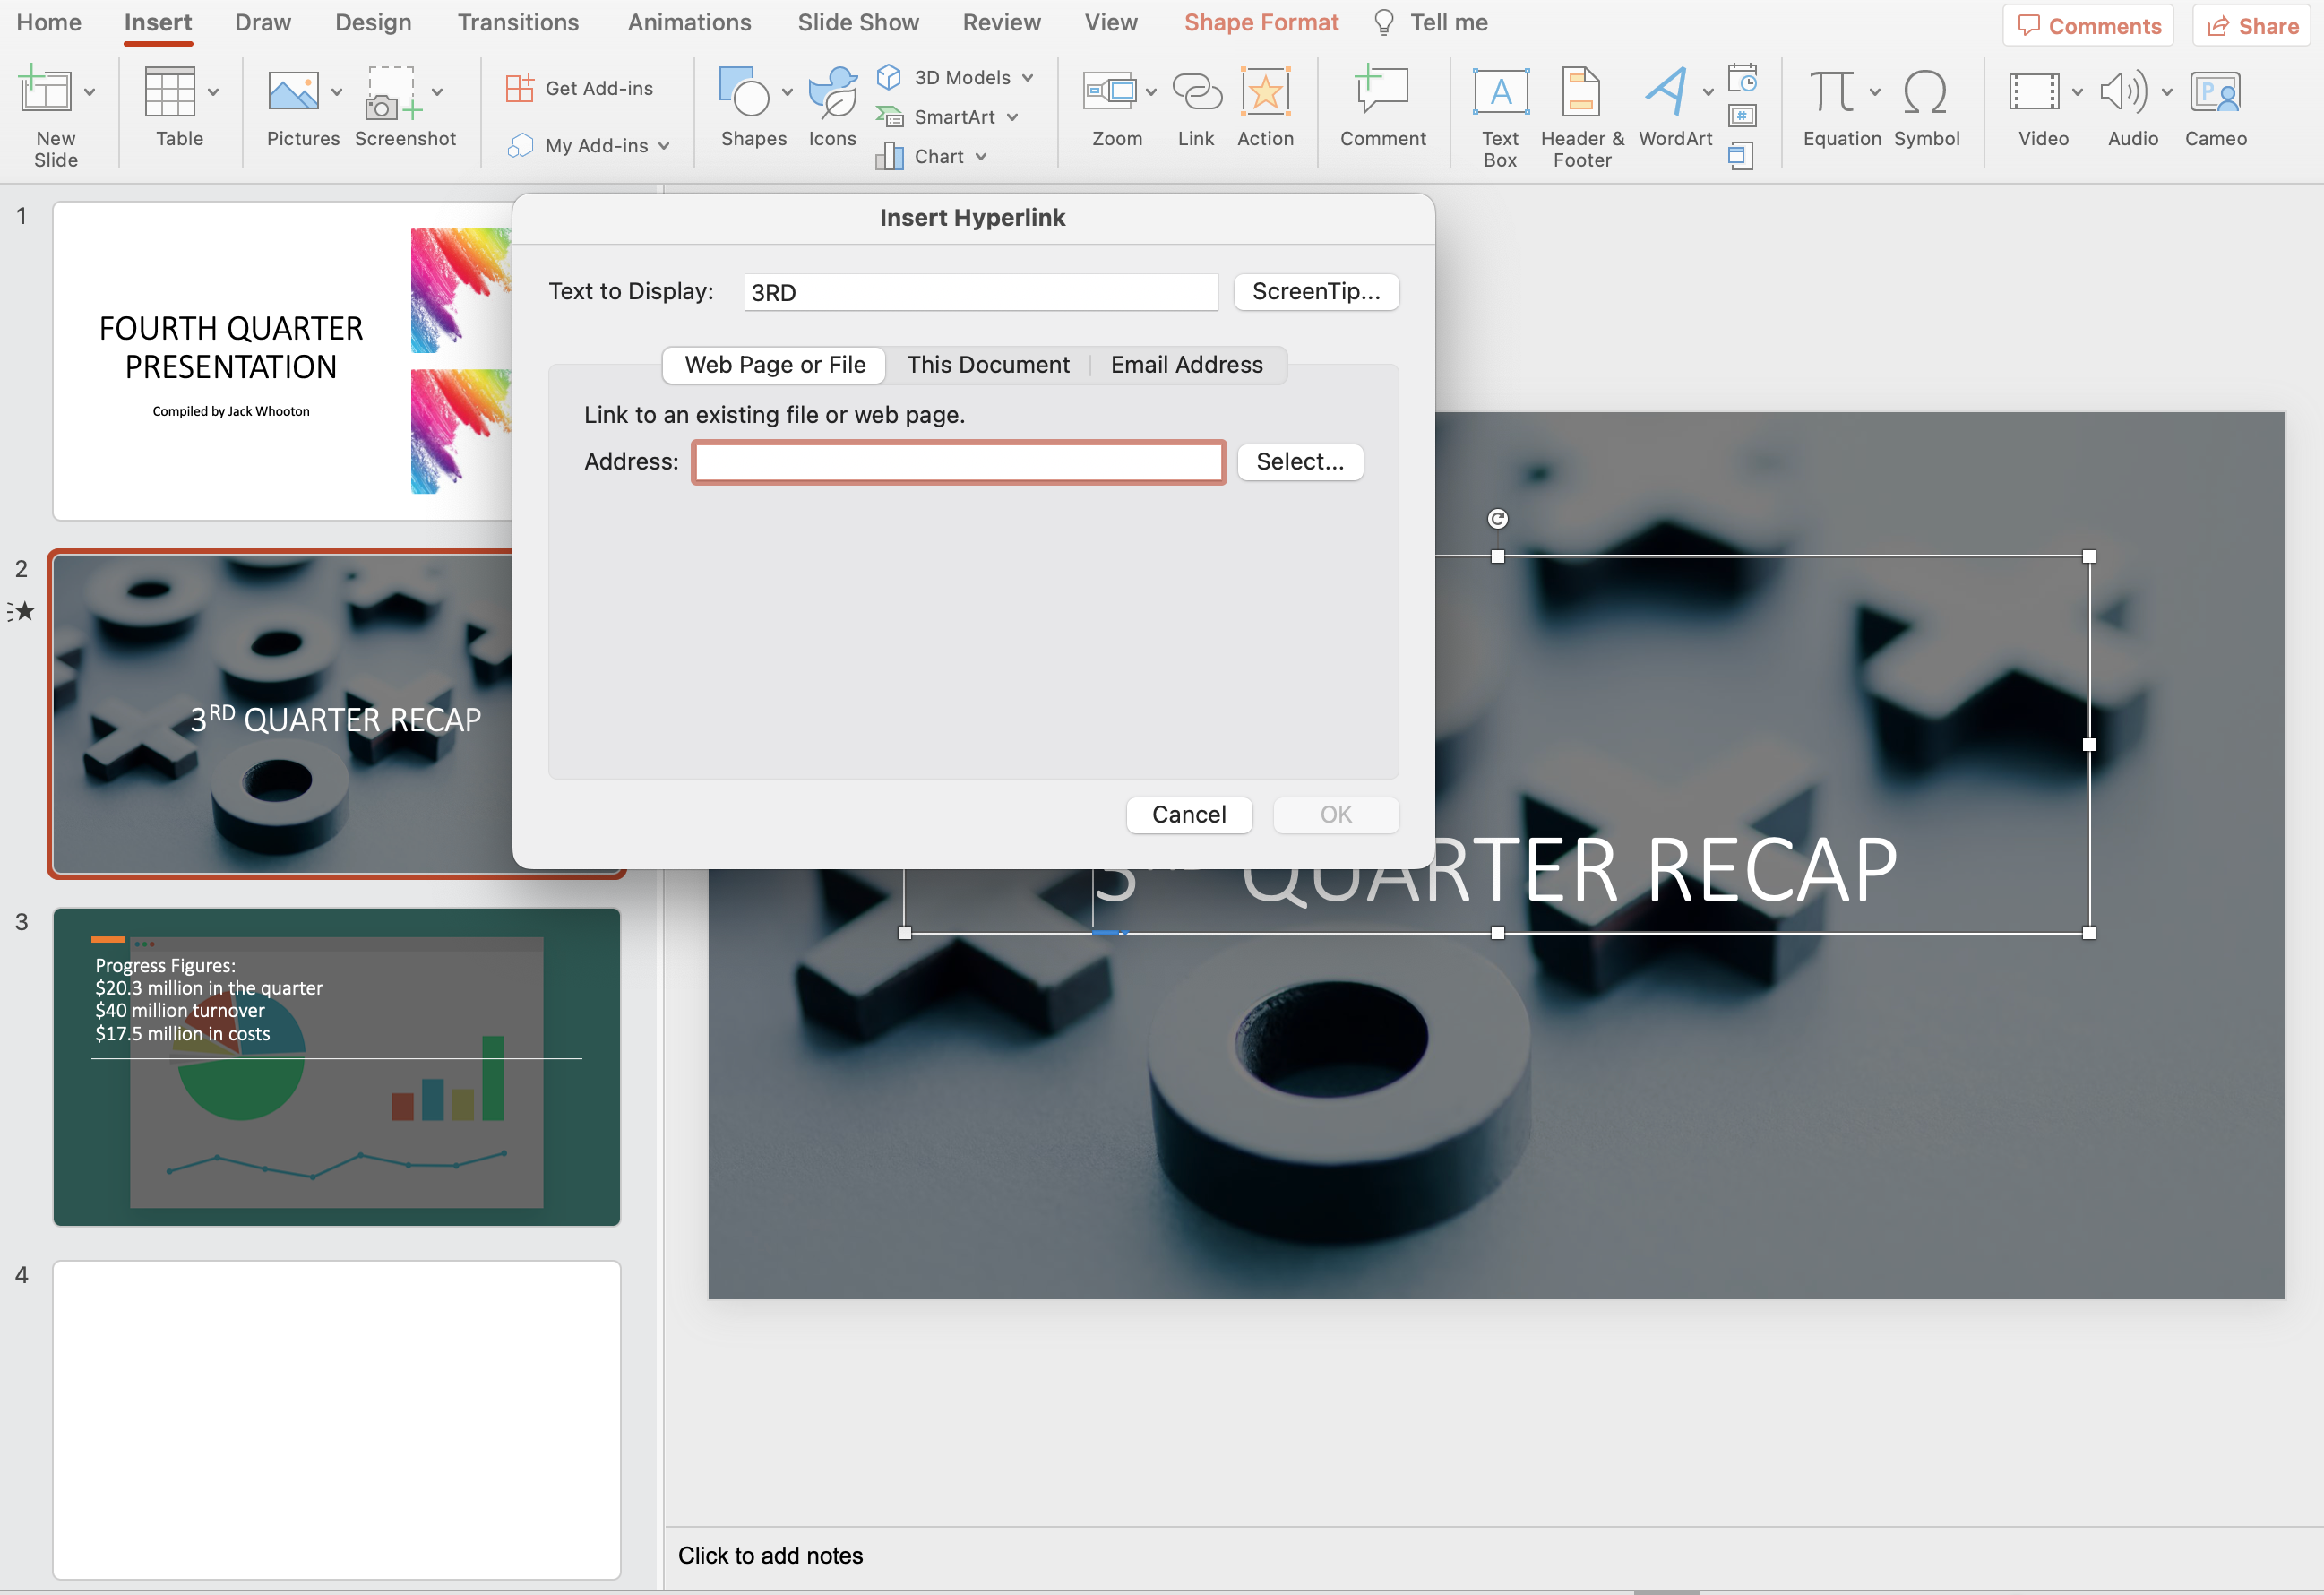
Adding a PDF as a hyperlink in PowerPoint is a convenient method to link external documents or information to a presentation.
By adding a hyperlink to a PDF, you will have the option to click on the link within the presentation, allowing your audience to access the PDF content without difficulty.
To create a hyperlink to your PDF file on a PowerPoint slide, follow these steps:
- Select the text, image, or object on the slide where you want to insert the hyperlink. This will act as the anchor for the PDF link.
- Click the “Insert” tab in the PowerPoint toolbar, and then choose “Hyperlink” to open the Hyperlink dialog box.
- Select “Existing File or Web Page” from the left-hand pane of the Hyperlink dialog box.
- Click “Browse”, “Select” or the File Folder icon, and find the PDF file you want to link to. Select the file and click “OK” to insert the PDF hyperlink.
- Customize the Display Text or Tooltip (optional). If you want to change the displayed text for the hyperlink or add a ScreenTip to provide more information, you can edit these fields in the Hyperlink dialog box.
After completing these steps, the PDF hyperlink will be added to the PowerPoint slide.
The PDF file will open in the default PDF viewer when clicked, providing your audience with simple access to the content.
By hyperlinking PDFs to your PowerPoint slides, you can create an interactive presentation experience and provide additional resources for your audience to investigate.
Read More: How to Remove Password From PDF File?
Editing and Customizing PDFs in PowerPoint
After inserting a PDF into a PowerPoint slide, you may desire to edit and customize it to match your presentation’s design and layout.
This section will discuss various editing techniques.
1. Resizing
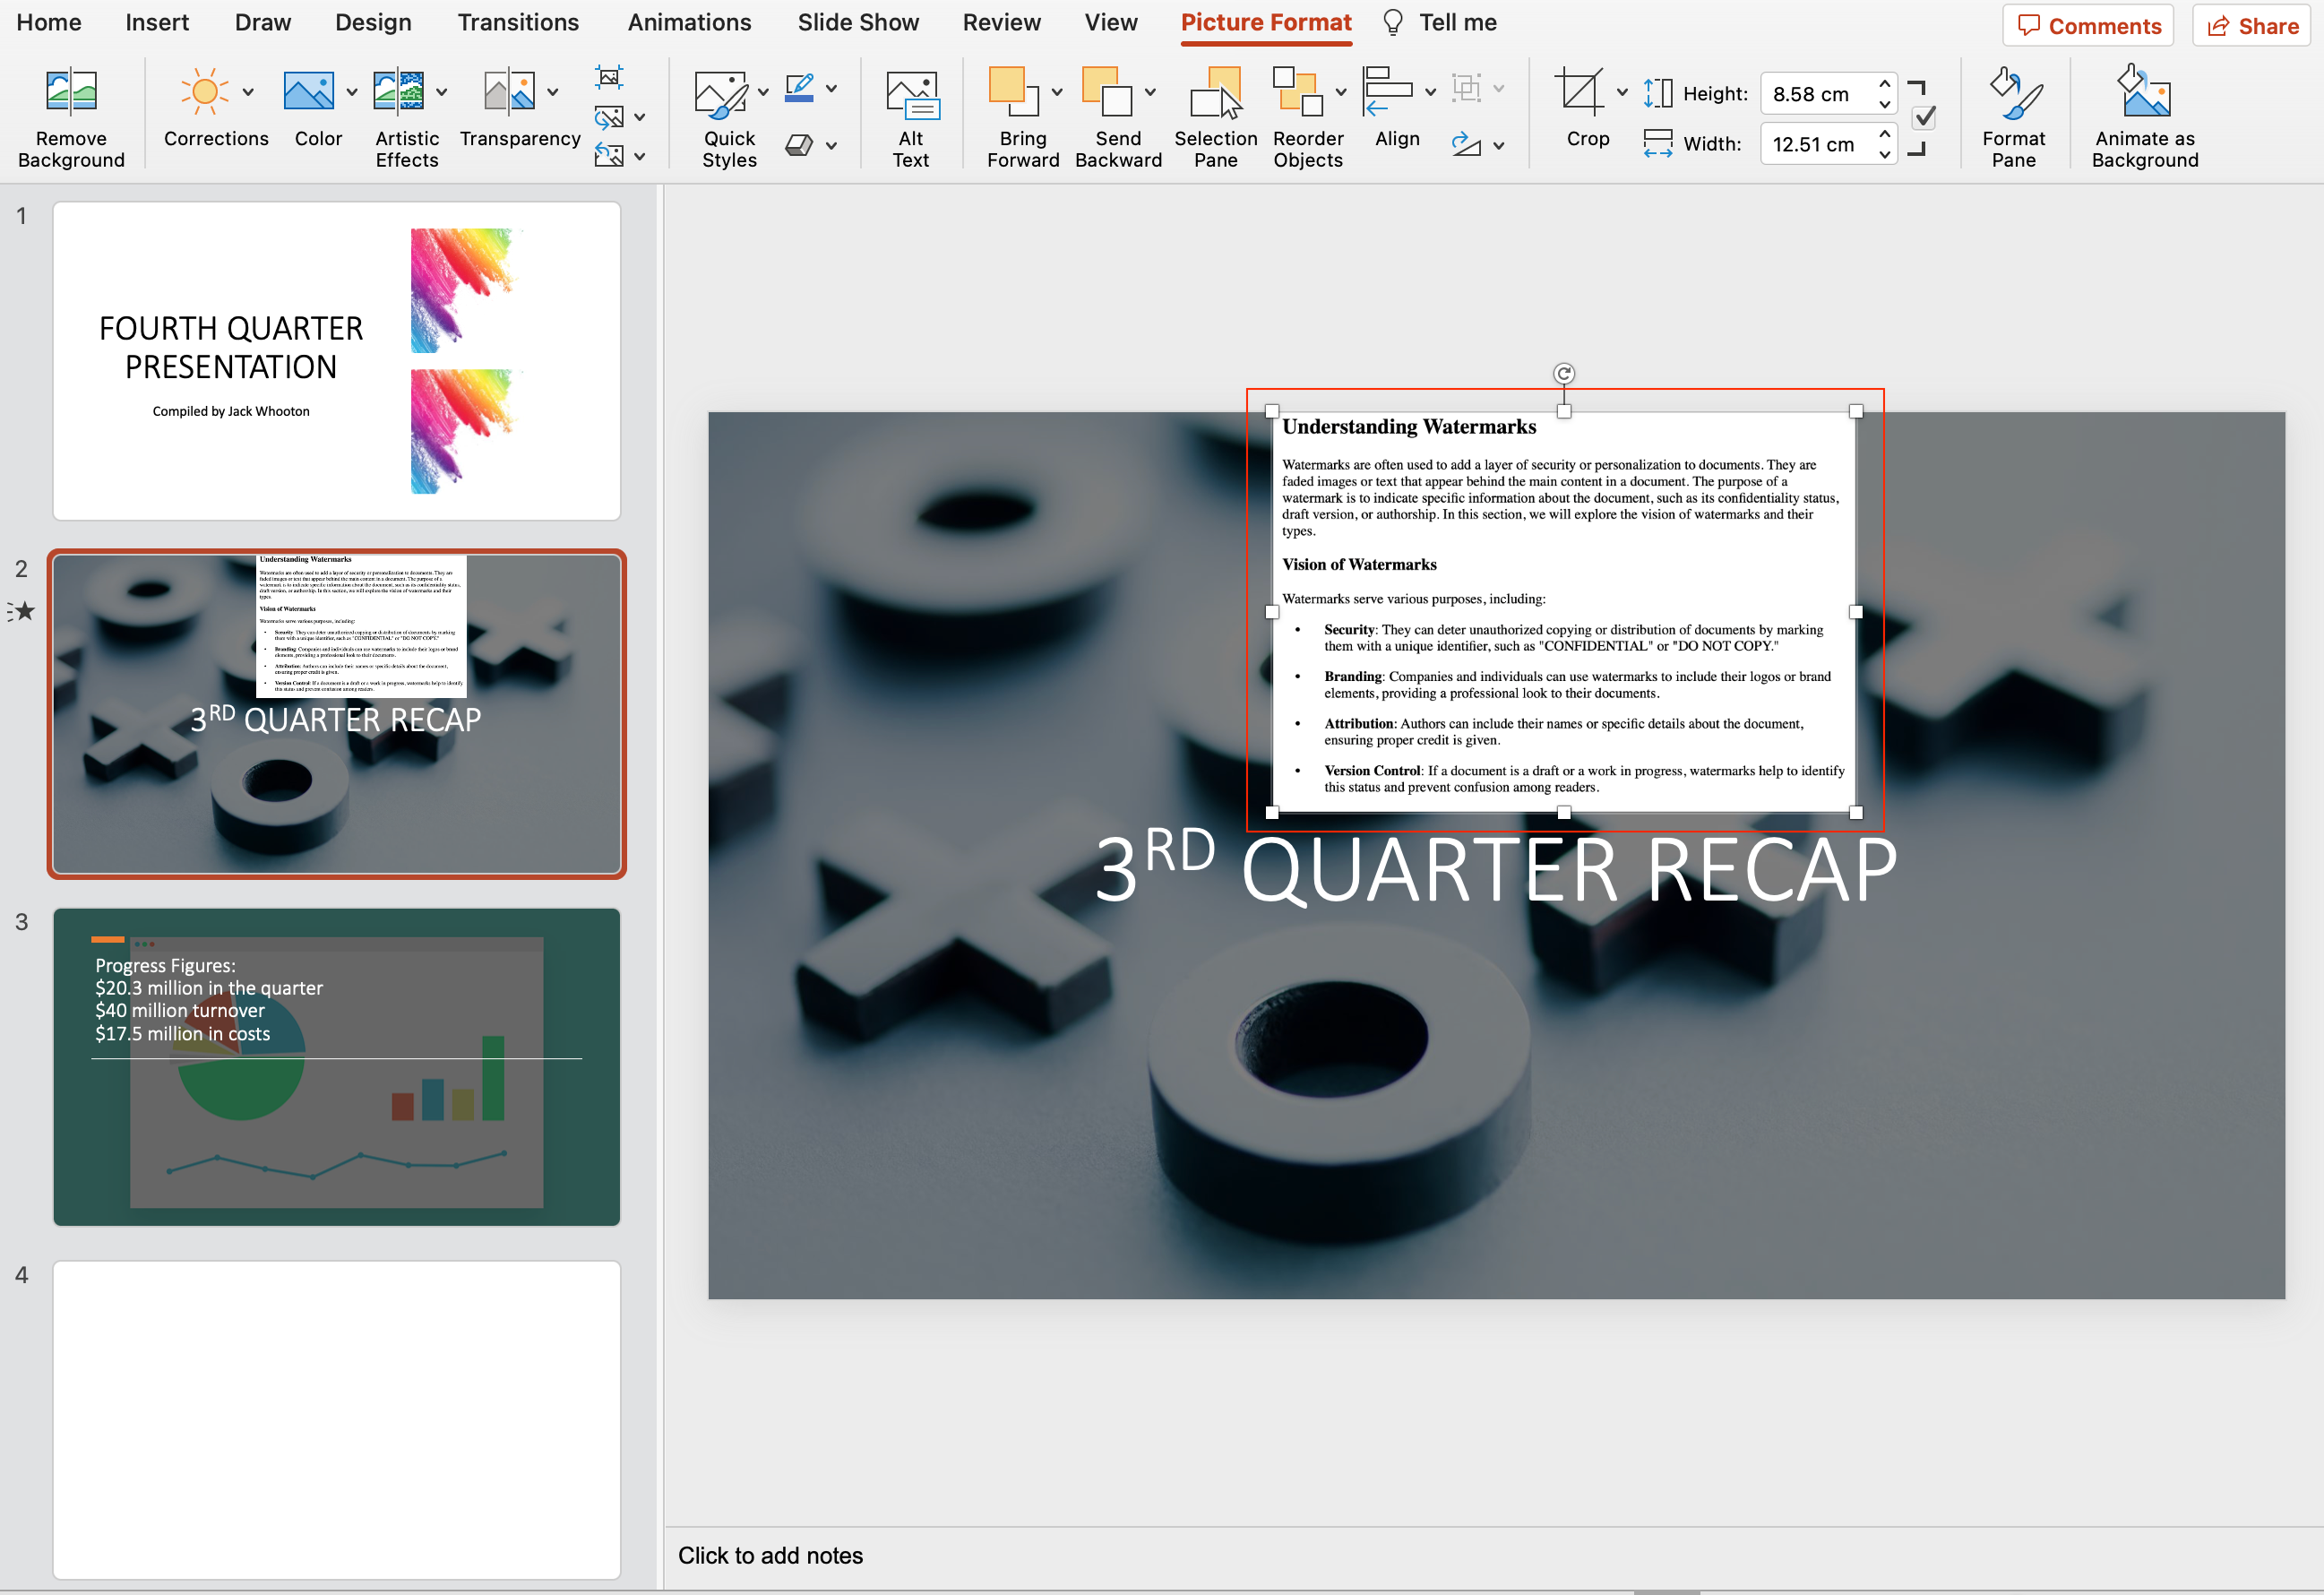
PowerPoint makes it easy to resize a PDF document.
To adjust the PDF’s dimensions, follow these steps:
- Select the PDF object by clicking on it.
- There are tiny squares, or “handles,” on the object’s corners and edges.
- Click and drag one of the controls to proportionally resize the PDF.
- Click and drag one of the edge handles to extend it horizontally or vertically.
- Release the mouse button when the intended size is reached.
Keep in mind that resizing the PDF may alter its resolution, resulting in a pixelated or indistinct appearance.
2. Cropping
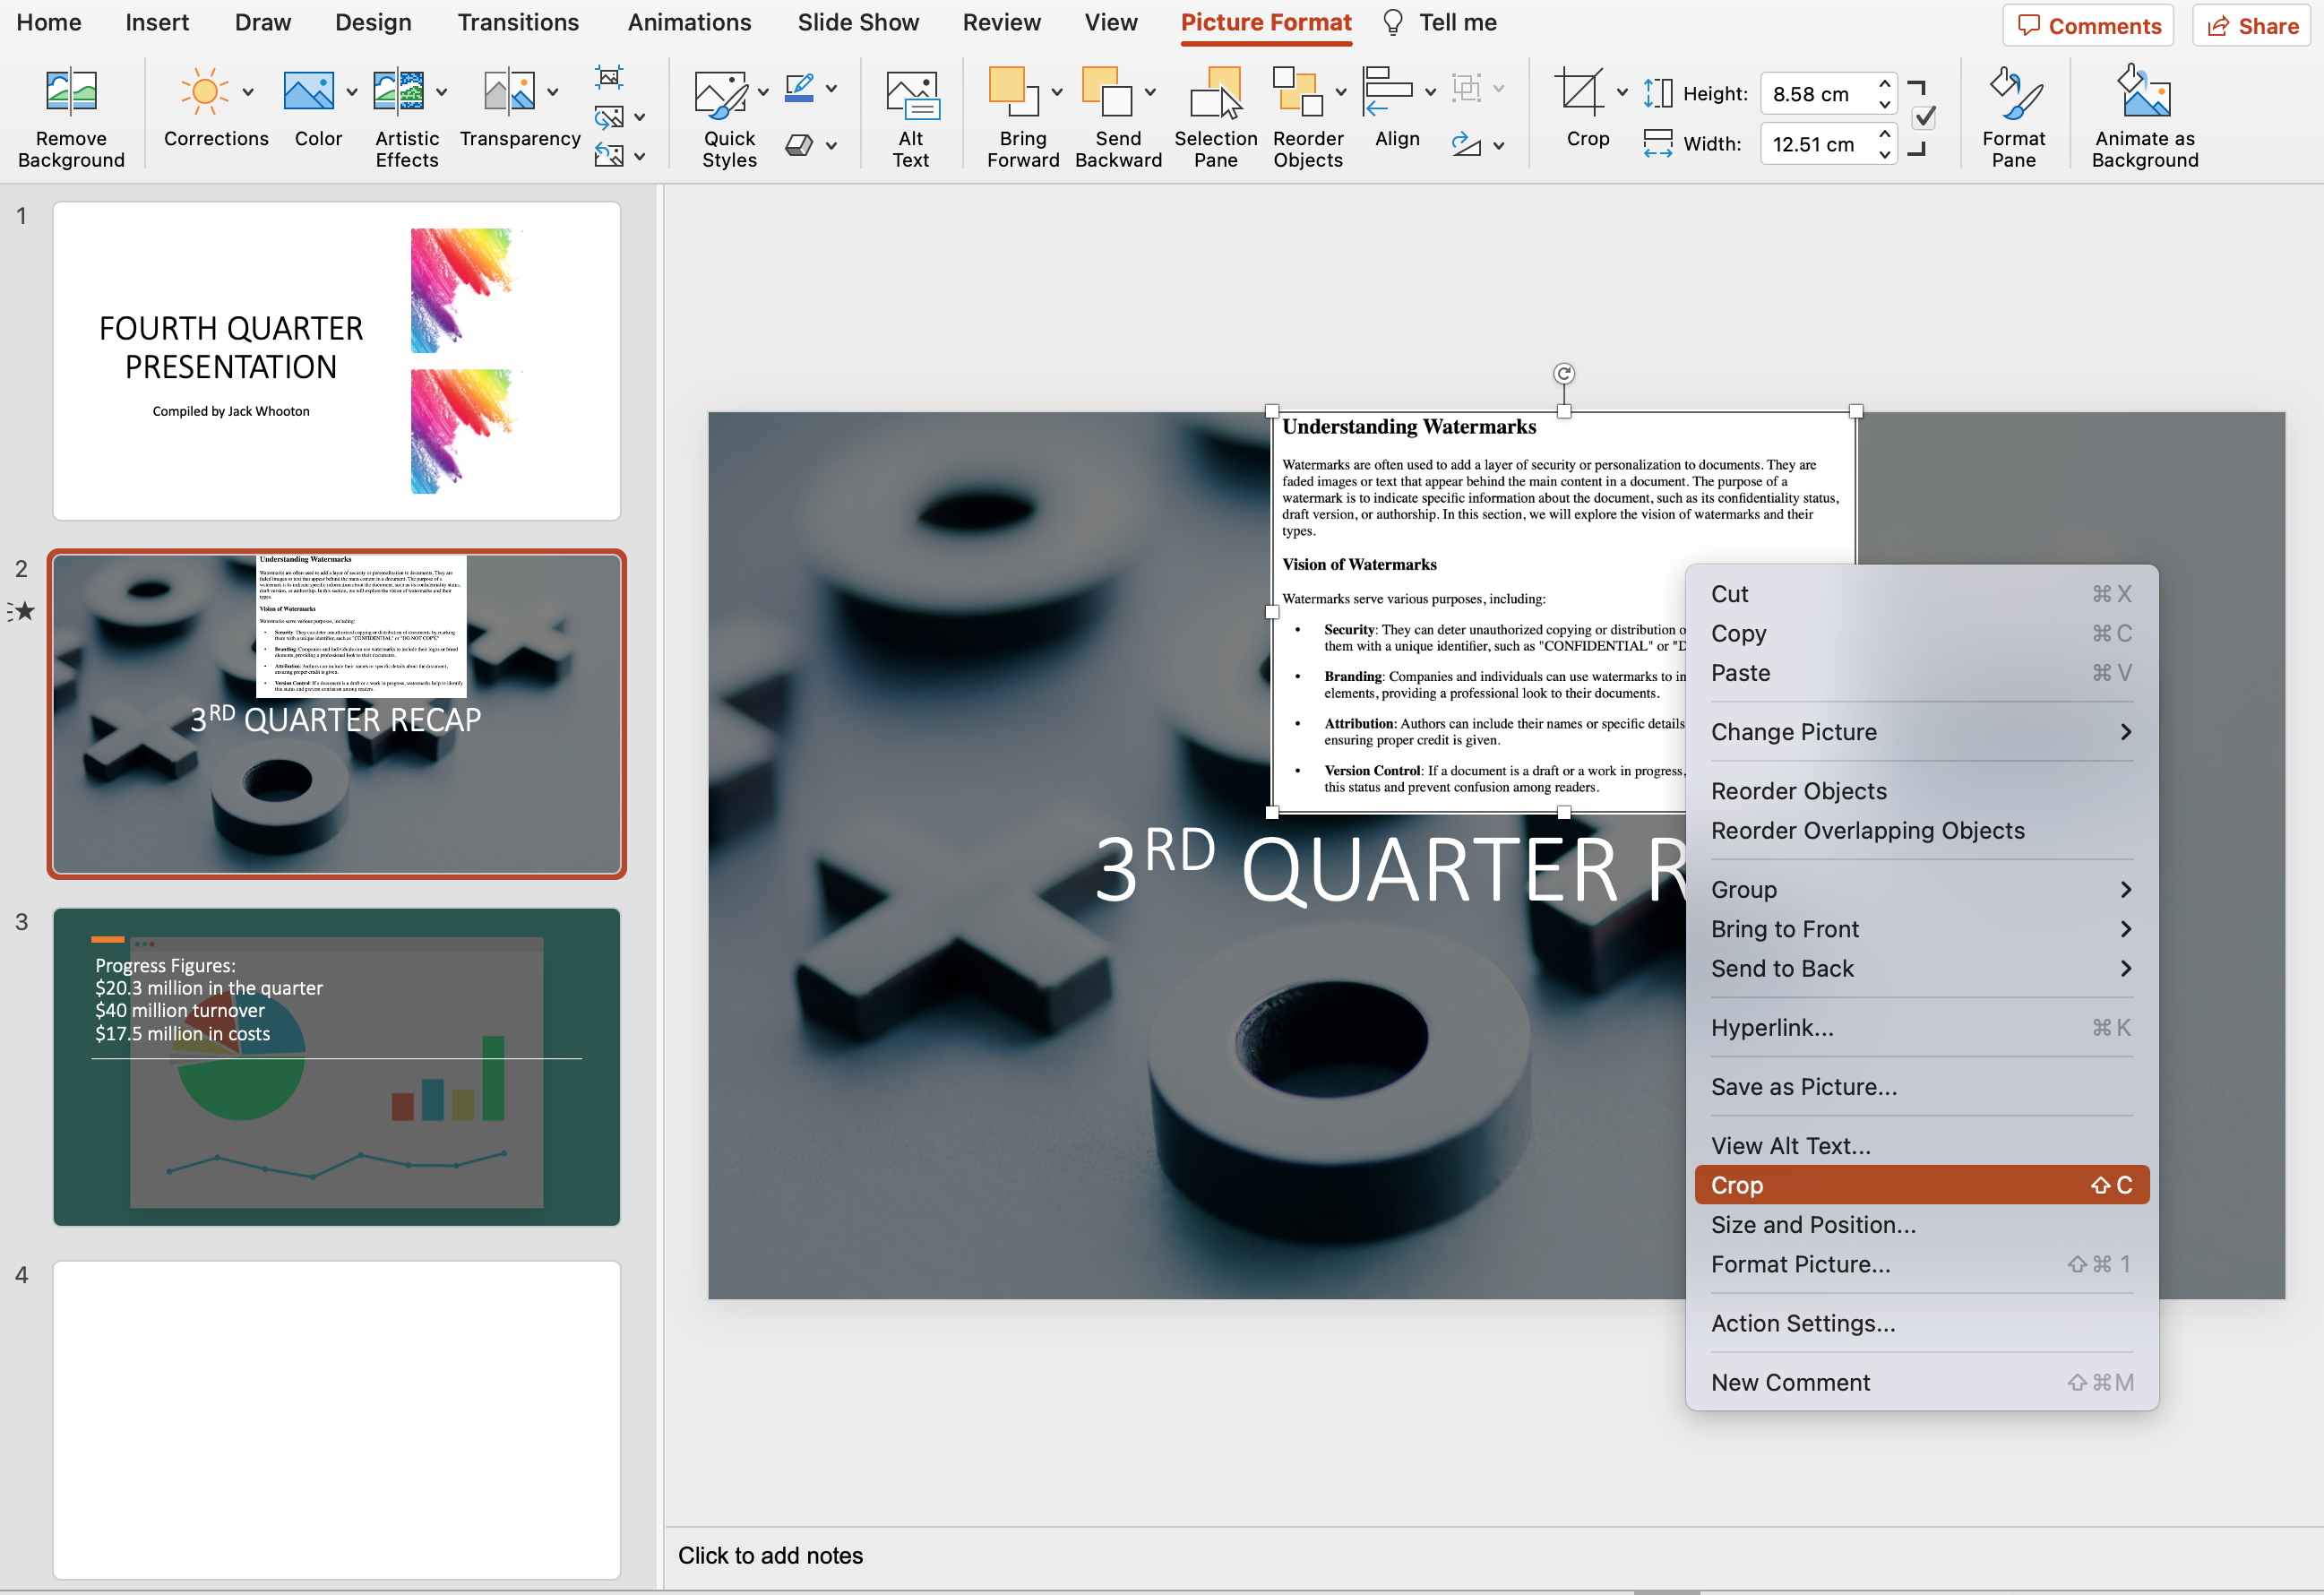
In PowerPoint, cropping a PDF allows you to eliminate unwanted portions and focus on specific areas.
Here’s how to resize a PDF document:
- Select the PDF object by clicking on it.
- Select the ‘Crop’ command from the Format tab on the toolbar’s command bar.
- On the edges and corners of the object, crop handles will emerge.
- To determine the portion of the PDF you wish to retain, click and drag the handles inward.
- To finalize the cropping, press ‘Enter’ or click elsewhere on the slide.
3. Mouse Actions
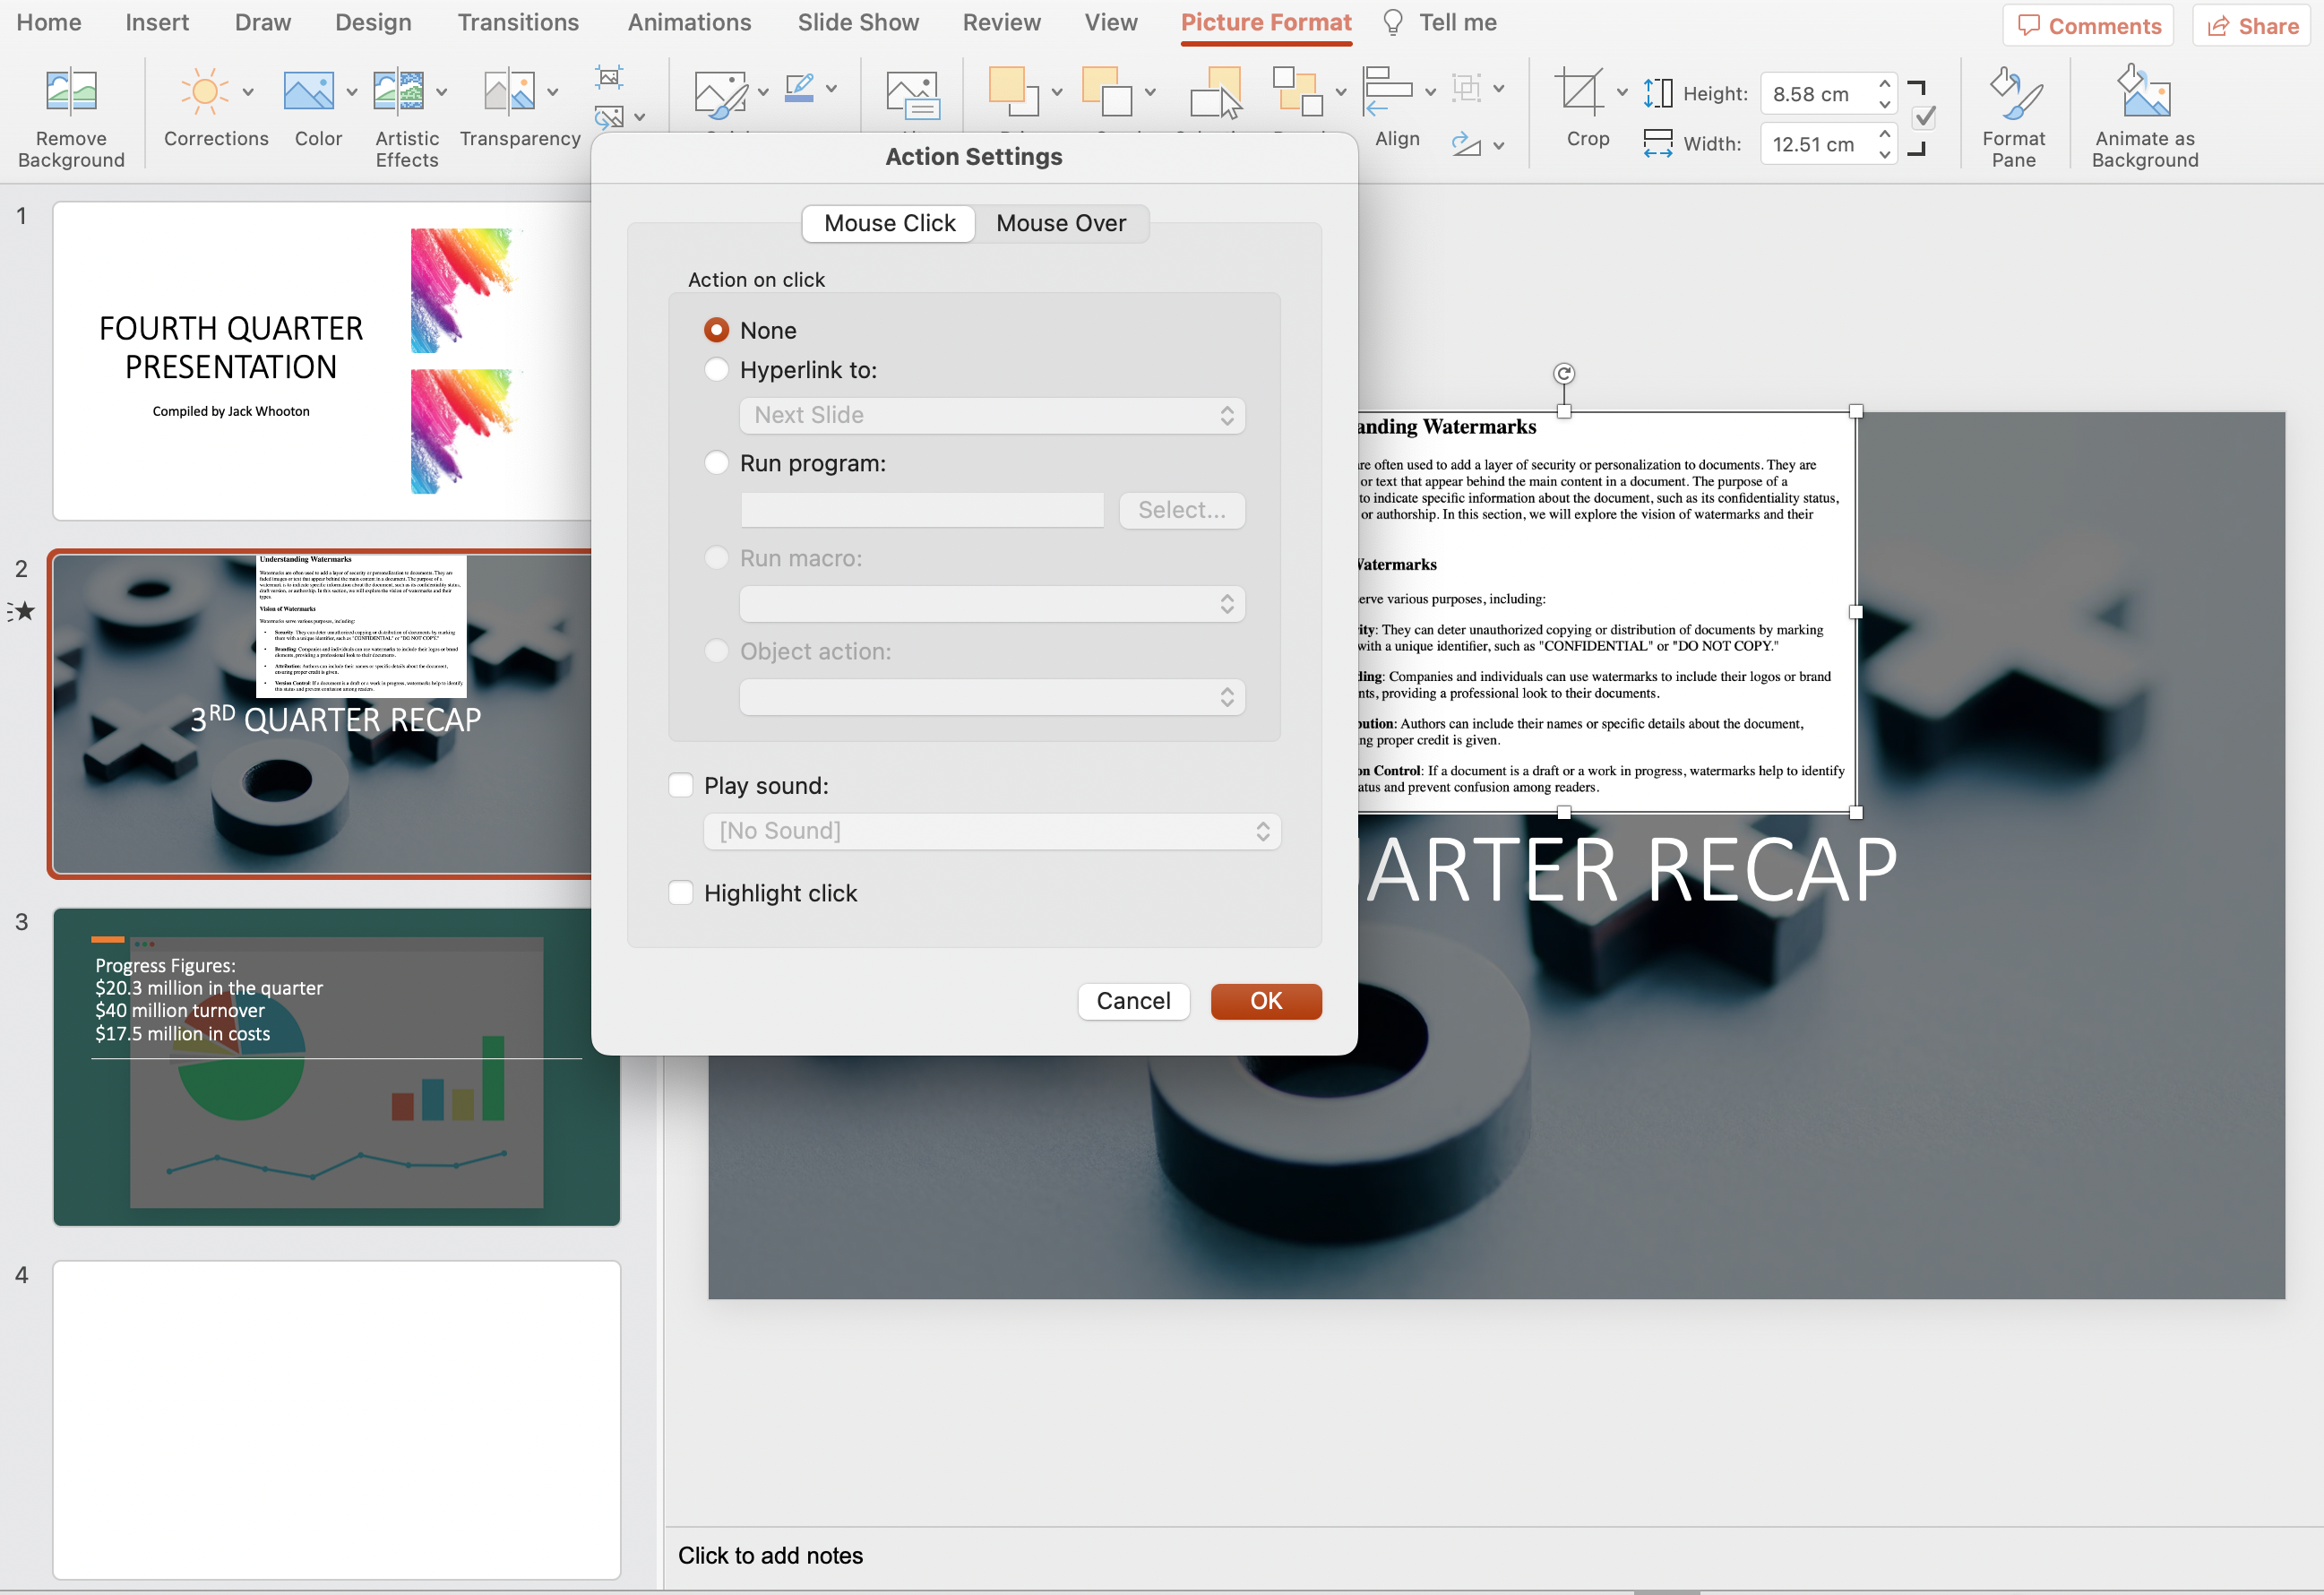
Adding mouse actions, such as mouse-over or mouse-click effects, can enhance the interactivity of your presentation.
To set a mouse action on your PDF object, follow these steps:
- Click on the PDF object to select it.
- Navigate to the ‘Insert’ tab, and in the ‘Links’ group, click on the ‘Action’ button or double right-click on the pdf object.
- In the ‘Action Settings’ window, you may choose between two actions: Mouse Click and Mouse Over.
- Mouse Click: This action occurs when you click on the PDF object during your presentation.
- Mouse Over: This action occurs when you hover the cursor over the PDF object without clicking.
- Choose how you want the PDF to be activated during the PowerPoint slideshow by clicking the Mouse Click tab or the Mouse Over tab.
- Click ‘OK’ to save the action settings.
With these editing techniques, you can customize your PDF and make it an interactive element within your PowerPoint presentation.
4. PDF Preview and Thumbnail in PowerPoint
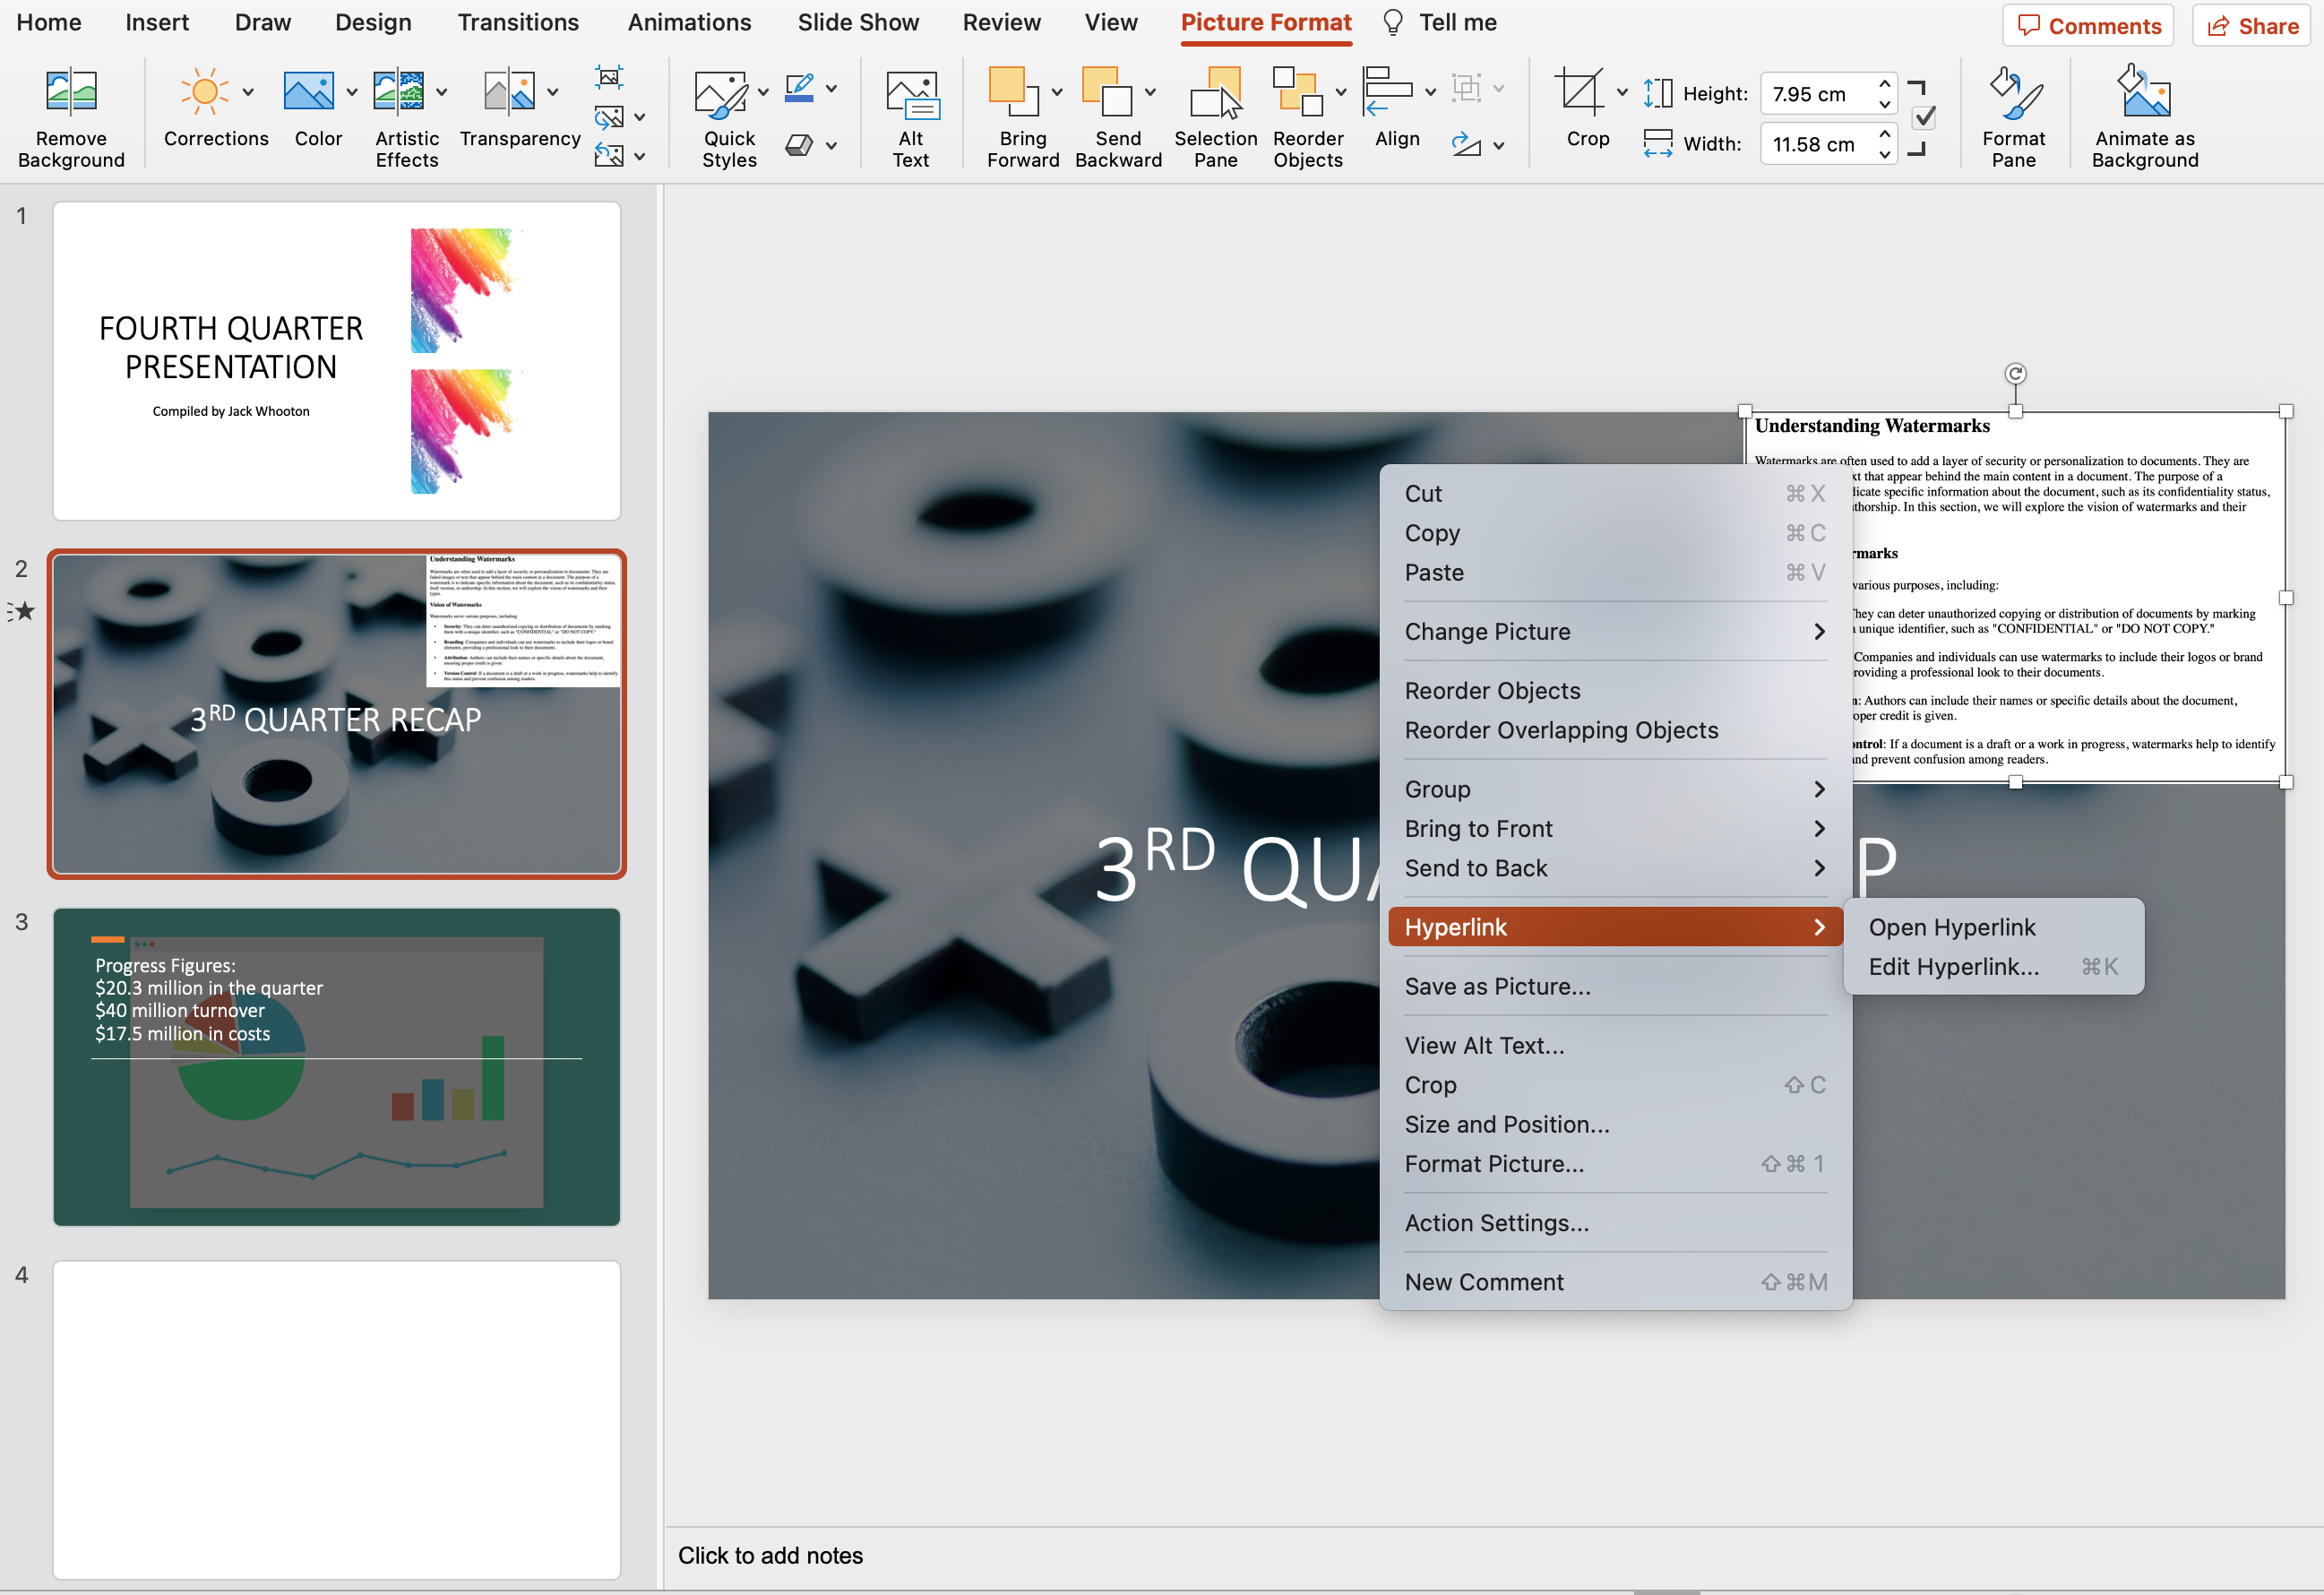
PowerPoint gives you the option to display PDF previews and thumbnails in order to enhance your presentation.
To accomplish this:
- Proceed to the section of your PDF file that you wish to use as a thumbnail.
- Take a screenshot of it with the steps we’ve provided.
- Insert the screenshot into the slide you desire.
- Using the steps we’ve supplied, you can link your entire PDF to the screenshot.
During the presentation, the thumbnail of the PDF content will be displayed to the audience.
You can add multiple thumbnails to your presentation by repeating the previous steps and selecting various PDF pages.
This enables you to create visually appealing presentations and maintain the attention of your audience.
Final Thoughts
Embedding a PDF into a PowerPoint presentation enables you to incorporate information from external sources, providing your audience with a visually appealing and comprehensive experience.
Remember to always ensure that you have the appropriate permissions to use PDF content, and to avoid violating copyright laws.
By adhering to these guidelines, you will be able to confidently and effectively incorporate PDFs into your PowerPoint presentations, thereby augmenting their overall clarity and efficacy.


